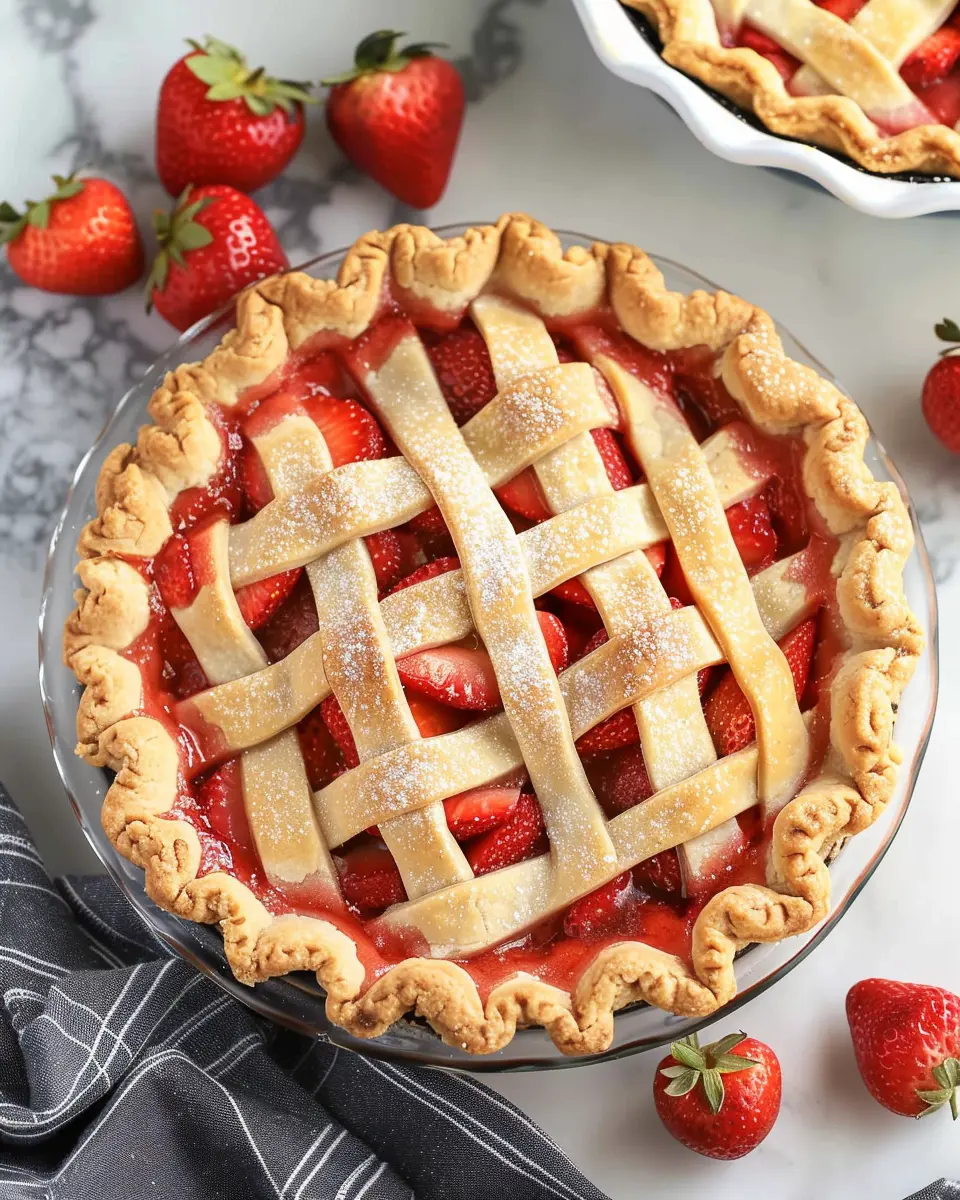

Introduction to Whipped Strawberry Tart
If you’re on the hunt for a delightful homemade dessert that wows both the eyes and the taste buds, look no further than the whipped strawberry tart. This exquisite dessert combines a buttery crust, luscious whipped strawberry filling, and an elegant presentation that feels like a special treat, but is surprisingly simple to make.
Why Whipped Strawberry Tart is a Game Changer for Homemade Desserts
Imagine this: you’re hosting a gathering, and a stunning tart becomes the centerpiece of your dessert table. With its fluffy texture and vibrant color, a whipped strawberry tart guarantees to turn heads and spark conversations. But beyond aesthetics, this dessert is a versatile canvas for flavors, allowing for creative variations. Whether you prefer a nutty crust with almond flour or a classic flaky pastry, the tart can easily accommodate your preferences.
You might wonder, “What makes this dessert stand out among others?” Well, not only is it a feast for the eyes, but it’s also light. The whipped texture creates a delightful contrast to the crisp tart shell, offering a refreshing treat. Research shows that desserts with fruit components are often regarded as healthier options, making them perfect for guilt-free indulgence (source: Healthline). Plus, strawberries are known for their rich vitamin C content, promoting a boost in immunity – always a bonus!
Using fresh, seasonal strawberries is key to elevating your tart. The sweetness of ripe strawberries, paired with the airy whipped cream, creates a harmonious blend that’s simply irresistible. And believe it or not, making this tart allows you to engage in a little culinary therapy; there’s something incredibly satisfying about whipping cream and folding in fresh ingredients.
So, why not treat yourself and your loved ones to something special? The whipped strawberry tart not only impresses but assures you that homemade can be equally quick, healthy, and elegant. Let’s dive into the recipe and start creating this showstopper!
For more tips and creative ideas, check out resources like Serious Eats or Bon Appétit that provide detailed dessert inspiration and techniques.
Ingredients for Whipped Strawberry Tart
Creating a beautiful whipped strawberry tart starts with the right ingredients. Here’s a breakdown of what you’ll need to make this delightful dessert come to life.
Tart Crust Ingredients
For the tart crust, you’ll want a buttery base that complements the strawberries perfectly. Gather the following:
- 1 ½ cups all-purpose flour
- ½ cup unsalted butter, chilled and cubed
- ¼ cup granulated sugar
- 1 egg yolk
- 1 to 2 tablespoons cold water
The chilling of the butter is essential for achieving that flaky texture we all love!
Whipped Strawberry Filling Ingredients
Now onto the star of the show, the whipped strawberry filling! It’s light, fluffy, and packed with fresh strawberry flavor. You’ll need:
- 2 cups fresh strawberries, hulled and sliced
- 1 cup heavy cream
- ½ cup powdered sugar
- 1 teaspoon vanilla extract
For a vibrant twist, consider using organic strawberries from a local farm. Trust me, the fresh taste will elevate your whipped strawberry tart to the next level.
By combining these simple ingredients, you’ll create a dessert that’s not only visually stunning but also bursting with flavor. Ready to whip up something delicious? Let’s get started!
Preparing Whipped Strawberry Tart
Creating a delightful whipped strawberry tart is an experience that brings a burst of summer flavors right to your kitchen. Whether you’re hosting a gathering or simply treating yourself, the steps below will guide you through this rewarding process.
Make the tart crust
The first step in crafting your whipped strawberry tart is to create a flaky, buttery tart crust. To achieve that perfect texture, gather the following ingredients:
- 1 ½ cups all-purpose flour
- ½ cup powdered sugar
- ½ cup unsalted butter (cold and cubed)
- 1 egg yolk
- A pinch of salt
Begin by mixing the flour, powdered sugar, and salt in a large bowl. Next, add in the cold butter cubes. Using a pastry cutter or your fingertips, blend the ingredients until they resemble coarse crumbs. Incorporating the egg yolk helps bind everything together. Once a dough forms, wrap it in plastic wrap and refrigerate for at least 30 minutes. This resting period allows the gluten to relax, ensuring a tender crust.
Bake the crust
While your dough is chilling, preheat your oven to 350°F (175°C). After 30 minutes, roll out your dough on a lightly floured surface to fit your tart pan. Gently transfer the rolled-out dough into the pan, trimming any excess from the edges.
To prevent the crust from bubbling while it bakes, place a layer of parchment paper over it, filling with pie weights or dried beans. Bake for about 15-20 minutes until golden brown. Then, carefully remove the weights and paper, and let the crust cool completely on a wire rack.
Prepare the whipped strawberry filling
Once the crust is cooled, it’s time to whip up the delicious filling. For the filling, you’ll need:
- 1 pound fresh strawberries (hulled and halved)
- 1 ½ cups heavy whipping cream
- 1/3 cup granulated sugar
- 1 teaspoon vanilla extract
- A pinch of salt
Start by pureeing half of the strawberries in a blender or food processor until smooth. Set aside. In a separate bowl, whisk the heavy cream, sugar, vanilla extract, and salt until stiff peaks form. Gently fold in the strawberry puree, creating a beautifully swirled mixture. Make sure not to overmix; you want that light and airy texture!
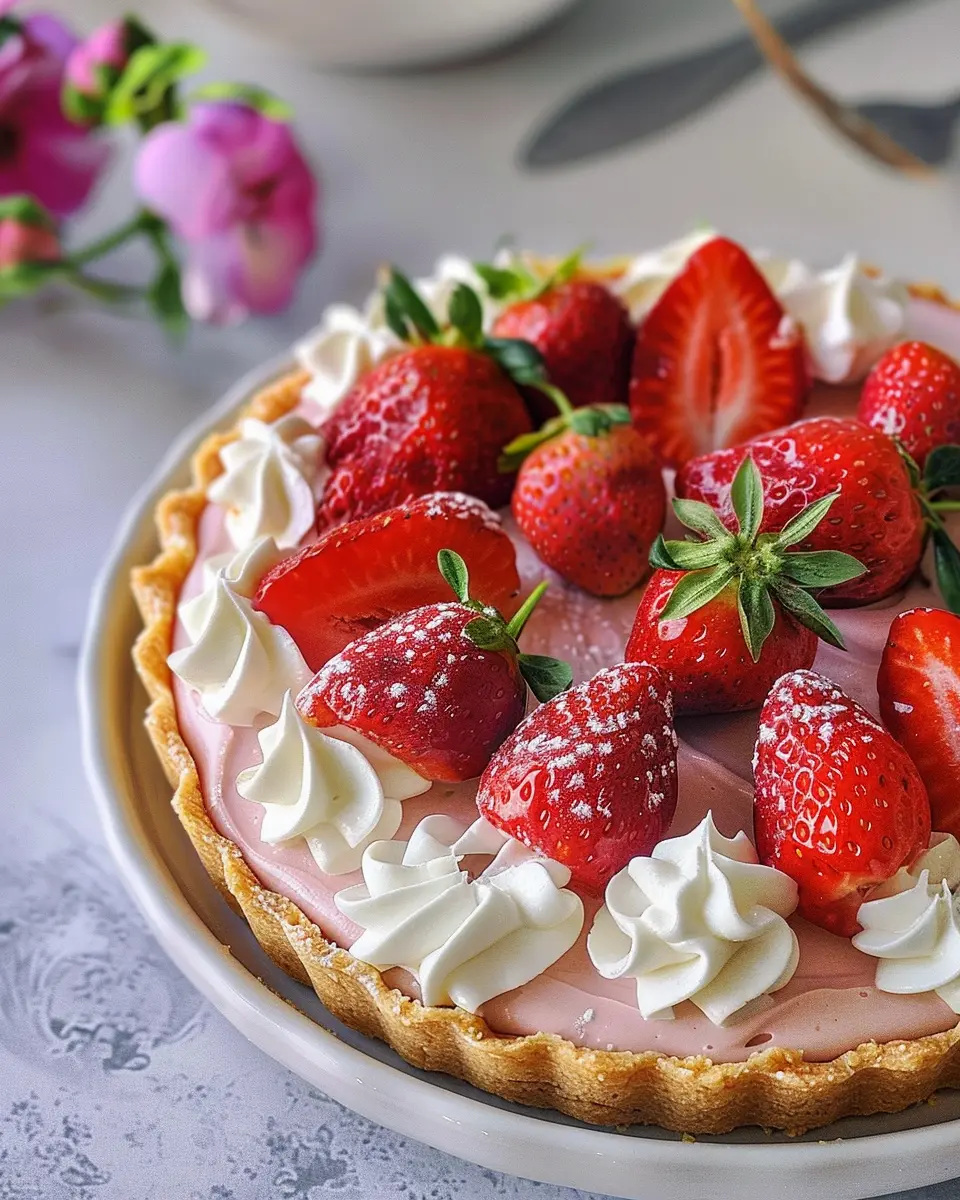
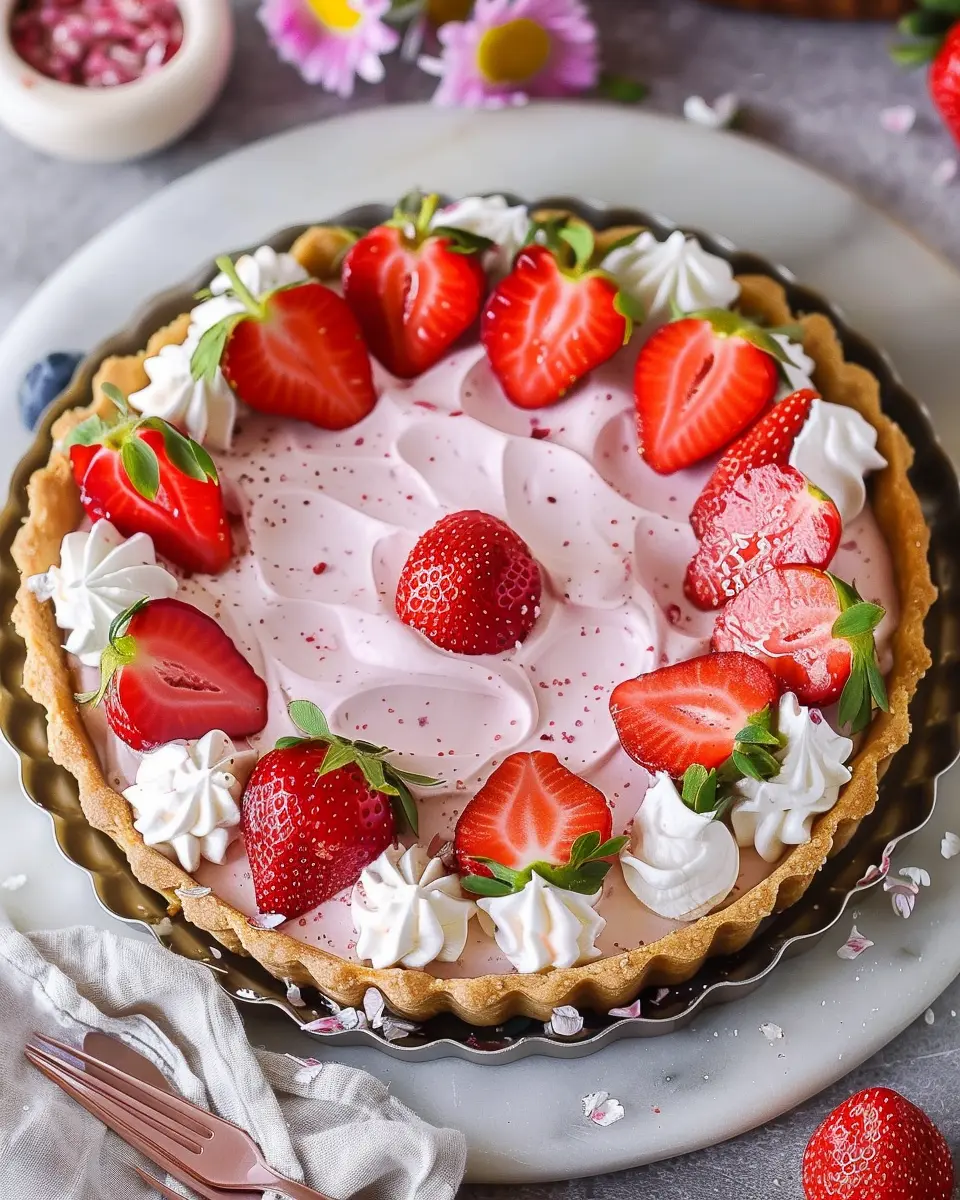
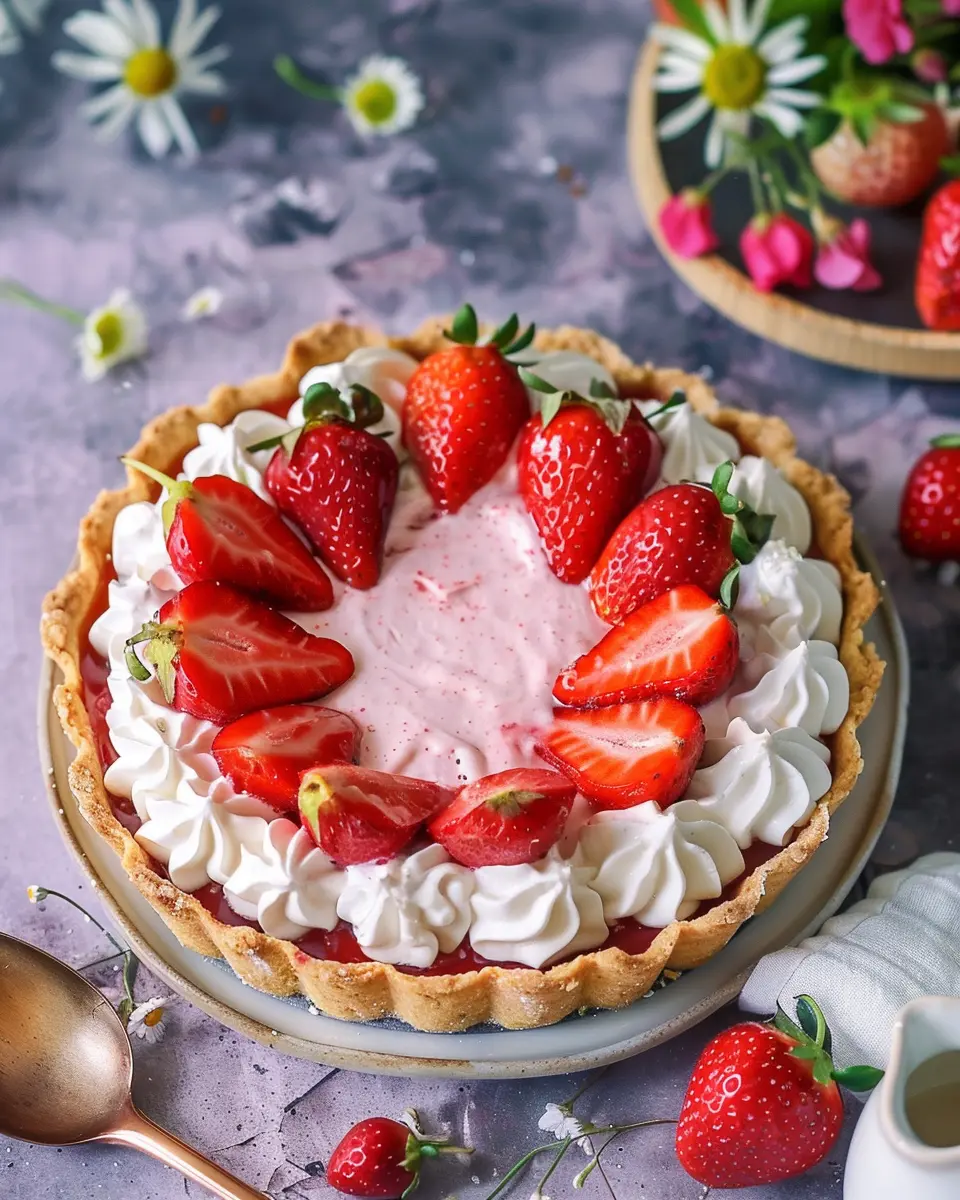
Layer the tart and chill
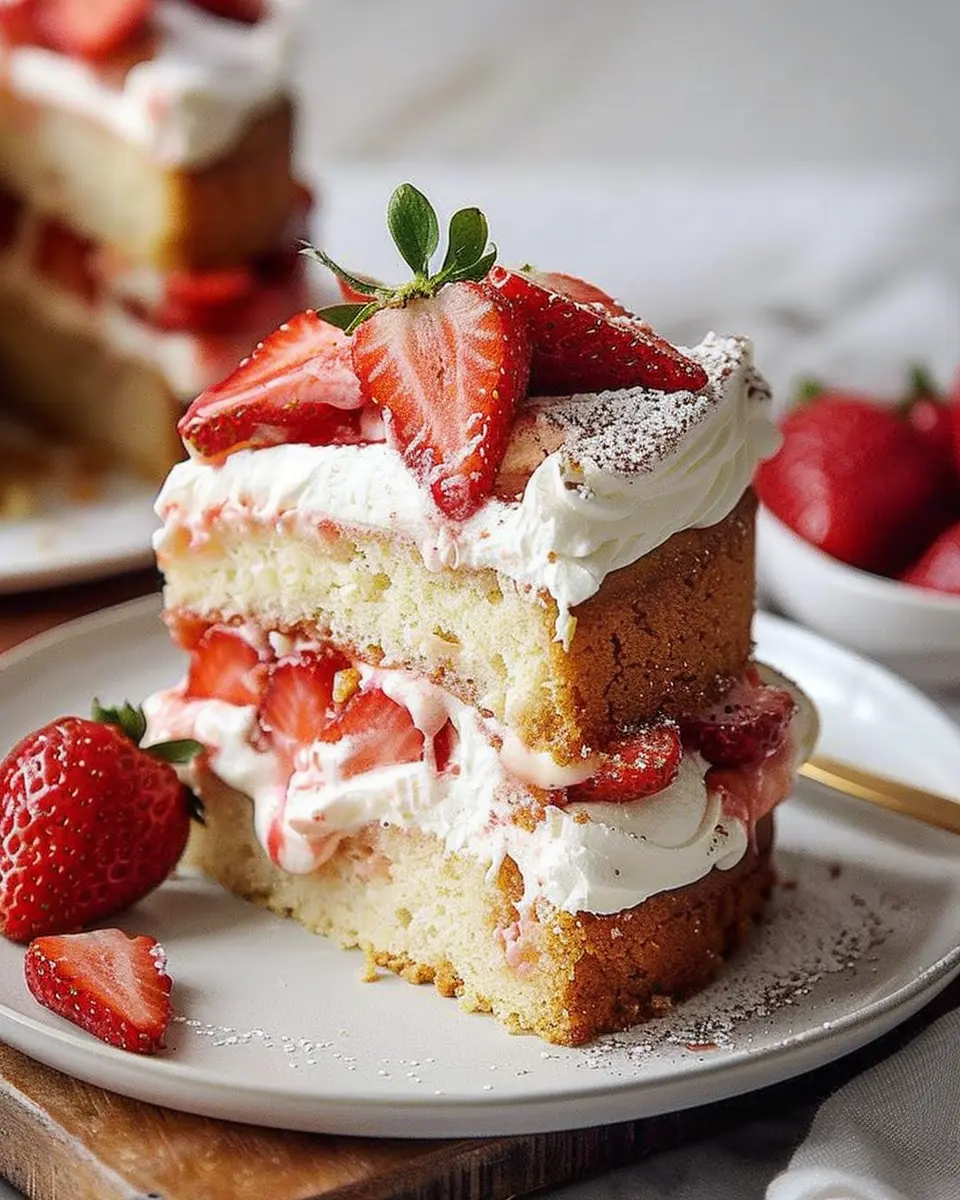
Now comes the fun part—layering your whipped strawberry tart! Spoon the whipped strawberry filling into your cooled tart crust, smoothing it out with a spatula. For a gorgeous presentation, slice the remaining strawberries and arrange them on top, fanning them out for that Instagram-worthy look.
Place the tart in the refrigerator for at least two hours to let it set properly. This chilling time is crucial as it firms up the filling, resulting in a slice that holds its shape.
Serve your delicious whipped strawberry tart
After patiently waiting, it’s finally time to serve your masterpiece! Slice the whipped strawberry tart into wedges and marvel at the vibrant layers. For an extra touch, consider drizzling some balsamic reduction over the top to enhance the strawberry flavor.
Gather your friends or family, or keep it all to yourself for a well-deserved treat! This tart pairs beautifully with a refreshing herbal tea or a fruit-infused lemonade.
Enjoy this delightful dessert and remember that baking can be just as joyful as the enjoyment that comes with sharing your creation. For more dessert ideas, don’t hesitate to check resources like Bon Appétit or Food Network for inspiration—your kitchen awaits!
In summary, making a whipped strawberry tart involves a few key steps: crafting the crust, baking it, preparing the filling, layering, and chilling before serving. Happy baking!
Variations on Whipped Strawberry Tart
When it comes to the whipped strawberry tart, versatility is the name of the game! Whether you’re in the mood for a rich chocolate twist or prefer a gluten-free option, these variations will sure to satisfy your sweet tooth.
Chocolate Whipped Strawberry Tart
Craving a bit of chocolate with your strawberries? The chocolate whipped strawberry tart is your answer! To make this delectable variation, simply incorporate melted dark chocolate or cocoa powder into the whipped filling. Here’s how:
- Melt dark chocolate: Stir in about 1/2 cup of melted dark chocolate (cooled) into your whipped cream and strawberry mixture.
- Add texture: Consider adding chocolate shavings or a drizzle of chocolate sauce on top for an extra treat.
- Find balance: The bitterness of the chocolate pairs beautifully with the sweetness of the strawberries—research shows that this combo can help elevate overall flavor (source: Food Science).
With this variation, you’ll create a dessert that’s not only visually stunning but also satisfies every chocolate lover’s cravings!
Gluten-Free Whipped Strawberry Tart
Don’t let dietary restrictions hold you back! The gluten-free whipped strawberry tart is equally delicious and can be made with just a few simple changes. Opt for a gluten-free crust, which you can prepare using:
- Almond flour: A fantastic substitute, giving your tart a unique flavor.
- Coconut flour: This alternative adds a delightful texture while remaining gluten-free.
You can find gluten-free crust recipes online or choose pre-made options for added convenience. Embrace the freedom to enjoy this refreshing treat without any gluten-related worries—and believe me, your friends won’t even notice the difference!
Whether you’re enjoying these variations at a gathering or simply on a cozy night in, they are bound to impress!
Cooking Tips for Whipped Strawberry Tart
Tips for perfecting the crust
A flaky crust is the foundation of any whipped strawberry tart, so here are some helpful tips to get it just right:
- Chill your ingredients: Use cold butter and ice water. This prevents the fat from melting and helps create that lovely flaky texture.
- Don’t overwork the dough: Mix until just combined. Over-kneading can result in a tough crust. Aim for a light touch!
- Blind bake for best results: Pre-bake your crust with weights to prevent bubbles. This keeps the texture crisp and perfectly complements the filling.
Tips for achieving the perfect filling texture
Now let’s talk filling! Achieving that smooth, divine consistency is key to a delightful whipped strawberry tart:
- Use ripe strawberries: Fresh, juicy strawberries will enhance the flavor and texture. Blend them into a puree, and strain for a smooth finish!
- Whip at the right speed: When combining the cream cheese and whipped cream, start at low speed to avoid splattering, then gradually increase to medium-high until you reach soft peaks.
- Incorporate flavor gently: Fold the strawberry puree into the whipped mixture carefully to maintain that airy texture.
For more tips on crusts and fillings, check out these expert baking resources for deep dives into techniques! Happy baking!
Serving Suggestions for Whipped Strawberry Tart
Creative Garnishes and Accompaniments
Your whipped strawberry tart can shine even brighter with a few thoughtful garnishes and accompaniments. Consider these delightful options:
- Fresh Mint Leaves: A sprinkle of mint can elevate the visual appeal while adding a refreshing taste.
- Crushed Pistachios or Almonds: These nuts provide a delightful crunch that contrasts beautifully with the creamy texture of the tart.
- Balsamic Glaze: A drizzle of balsamic reduction enhances the tart with a sweet-savory flavor profile.
- Chantilly Cream: A dollop of light, sweetened cream on the side amps up the indulgence factor.
- Seasonal Berries: Complement your tart by serving it with mixed berries like blueberries or raspberries for vibrant color and tart flavor.
Ideal Occasions for Serving
The whipped strawberry tart is versatile enough to shine at various occasions! Imagine serving it at:
- Summer Gatherings: Perfect for picnics or BBQs, its lightness is a hit on warm days.
- Birthday Celebrations: The vibrant color and rich flavor make it a stunning centerpiece for dessert tables.
- Brunch Events: This tart pairs beautifully with coffee or herbal teas, making it an ideal choice for those leisurely Sunday brunches.
- Holiday Dinners: Impress your guests during festive gatherings with a refreshing take on dessert.
With these suggestions, your whipped strawberry tart will not only taste amazing but also visually enchant your guests. For more on how to enhance your dessert experience, check out resources like Bon Appétit for inspiring serving ideas!
Time Breakdown for Whipped Strawberry Tart
Preparation time
Creating your whipped strawberry tart requires a thoughtful approach. Set aside about 30 minutes for preparation. This includes washing, slicing strawberries, and whipping your cream to perfection. It’s a great way to unwind after a busy day—just put on some music and enjoy the process!
Cook time
The baking part is a breeze, taking around 25 minutes. Make sure to keep an eye on your crust as it turns golden brown; a perfectly cooked crust is crucial for that delightful crunch contrasting the smooth filling.
Total time
In total, you’ll invest about 55 minutes in crafting this delicious tart. It’s a small time commitment for such a rewarding dessert! Plus, the leftovers (if there are any!) make for a sweet late-night snack or a lovely treat to share with friends. Ready to impress your guests? For more delightful recipe inspirations, check out Gourmet Mom or Food52.
Nutritional Facts for Whipped Strawberry Tart
Calories per slice
A delightful slice of whipped strawberry tart contains approximately 250 calories. This is fairly moderate for a dessert, making it a wonderful treat without overindulging. Enjoying it occasionally can fit well within most balanced diets!
Essential nutrients
Not only does this whipped strawberry tart satisfy your sweet cravings, but it also comes packed with essential nutrients, including:
- Vitamin C: Strawberries are a fantastic source of this essential vitamin, which supports your immune system and skin health.
- Fiber: Each slice contains dietary fiber that aids digestion and promotes a feeling of fullness.
- Healthy fats: The whipped cream or yogurt contributes some beneficial fats that can enhance your overall well-being.
Allergen info
If you’re planning to make or serve this tart, it’s crucial to note common allergens:
- Contains dairy from whipped cream or yogurt.
- May include gluten depending on the tart crust.
- Generally nut-free, but always check your ingredients.
For more detailed nutritional guides, consider exploring resources like the USDA FoodData Central or the Academy of Nutrition and Dietetics for expert-approved insights!
FAQs about Whipped Strawberry Tart
Can I use frozen strawberries?
Absolutely! Using frozen strawberries in your whipped strawberry tart is a convenient alternative, especially when fresh strawberries are out of season. Just be sure to thaw them completely and drain any excess liquid; this will help maintain the tart’s texture. You can still enjoy a delicious and creamy filling that tastes just as delightful as the fresh version. For more tips on using frozen fruit, check out this resource from USDA Produce Safety.
How do I store leftover tart?
If you happen to have any leftover whipped strawberry tart, you’ll want to store it properly to maintain its flavor and texture. Place any remaining slices in an airtight container and refrigerate for up to 3 days. Just keep in mind that the crust may become slightly softer over time—nothing that a quick re-chill in the fridge can’t fix!
Can I make the tart ahead of time?
Yes, making your whipped strawberry tart ahead of time is completely feasible! You can prepare the crust and filling separately a day in advance, then assemble them right before serving. This not only saves time but also allows the flavors to meld beautifully. Just remember to keep the tart covered in the fridge to avoid absorbing any odors from other foods.
Feeling adventurous? Check out more strawberry dessert tips on BBC Good Food for inspiration!
Conclusion on Whipped Strawberry Tart
Creating a whipped strawberry tart is not only an enjoyable kitchen project but also a rewarding way to impress your friends and family. With its fluffy texture and vibrant flavors, this dessert embodies the essence of spring and summer. The blend of whipped cream with fresh strawberries highlights the fruit’s natural sweetness, making it a perfect centerpiece for any gathering.
The tart’s simplicity means you can whip it up even on a busy weeknight. Plus, it’s a fantastic way to experiment with various toppings or crusts. Whether you’re celebrating a special occasion or just treating yourself, this dessert is truly worth making. So why wait? Dive into this delightful recipe today and savor each delicious bite! For more tips on enhancing your baking skills, check out Joy of Baking and Smitten Kitchen.
PrintWhipped Strawberry Tart: Easy Twist on a Classic Delight

A delightful twist on a classic dessert, this Whipped Strawberry Tart combines sweet strawberries with a rich whipped filling.
- Prep Time: 20 minutes
- Cook Time: 15 minutes
- Total Time: 2 hours 35 minutes
- Yield: 8 servings 1x
- Category: Dessert
- Method: Baking
- Cuisine: American
- Diet: Vegetarian
Ingredients
- 1 cup strawberries, hulled and sliced
- 1 pie crust (store-bought or homemade)
- 1 cup heavy cream
- 1/2 cup powdered sugar
- 1 teaspoon vanilla extract
- 1 tablespoon lemon juice
Instructions
- Preheat the oven and bake the pie crust according to package instructions or your recipe.
- In a mixing bowl, whip the heavy cream, powdered sugar, and vanilla extract until soft peaks form.
- Gently fold in the sliced strawberries and lemon juice into the whipped cream.
- Pour the mixture into the cooled pie crust and spread evenly.
- Chill in the refrigerator for at least 2 hours before serving.
Notes
- For extra flavor, consider adding a splash of almond extract.
- Make sure the pie crust is fully cooled before adding the filling.
Nutrition
- Serving Size: 1 slice
- Calories: 280
- Sugar: 12g
- Sodium: 150mg
- Fat: 22g
- Saturated Fat: 14g
- Unsaturated Fat: 6g
- Trans Fat: 0g
- Carbohydrates: 28g
- Fiber: 1g
- Protein: 2g
- Cholesterol: 60mg
Keywords: Whipped Strawberry Tart, dessert, tart, strawberries, whipped cream