
Introduction to Homemade Sourdough
Baking your own bread can be one of the most rewarding experiences you’ll ever have in the kitchen. There’s something incredibly satisfying about kneading dough, watching it rise, and smelling the warm aromas wafting through your home. It’s not just about making food; it’s about cultivating a habit, nurturing a skill, and bringing a sense of accomplishment every time you slice into that fresh loaf. If you’ve ever thought about trying your hand at homemade sourdough, you’re in for a delightful journey.
The Joy of Baking Bread at Home
Imagine waking up to the scent of freshly baked bread permeating your space. For many, that dream begins with homemade sourdough. This bread, distinguishable by its unique tangy flavor and crispy crust, offers a complexity that store-bought loaves simply can’t match. Plus, making sourdough isn’t just about the end product; the process is a therapeutic blend of art and science.
To get started, there are a few essentials you’ll need:
- Quality Ingredients: Flour, water, and salt are your three best friends.
- Patience and Observation: Sourdough is a living thing, requiring time for fermentation and development.
- A Sense of Adventure: Don’t be afraid to experiment with different types of flour or add-ins like nuts or seeds.
If you’re wondering where to find the best resources, books like “Tartine Bread” by Chad Robertson offer a treasure trove of knowledge, while websites like King Arthur Baking provide excellent guides and community advice.
Baking homemade sourdough can also be a great way to unwind after a hectic day. Have you ever found yourself feeling stressed at work? The repetitive action of kneading dough can be surprisingly meditative. Plus, you’ll learn through trial and error, transforming not just ingredients, but also your kitchen confidence.
So, are you ready to embark on this delicious adventure? Making homemade sourdough can be both a form of self-care and a way to share your creations with friends and family. With just a touch of dedication and a sprinkle of creativity, you’ll soon be serving up crusty, flavorful loaves that will impress anyone lucky enough to share your table. Stay tuned as we dive into the specifics of crafting your perfect loaf!

Ingredients for Homemade Sourdough
Essential ingredients for a basic sourdough
Creating delicious homemade sourdough requires just a few simple ingredients. Here’s what you’ll need to get started:
- Flour: Choose a high-quality all-purpose or bread flour. You can also experiment with whole wheat flour for added flavor.
- Water: Use filtered or dechlorinated water, as chlorine can inhibit the fermentation process.
- Salt: A crucial ingredient that not only enhances flavor but also strengthens the dough. Sea salt is a great choice.
- Sourdough Starter: This is the heart of your sourdough! If you don’t have one, consider checking out resources like King Arthur Baking to learn how to cultivate your own.
Recommended tools for your sourdough journey
Having the right tools can make your experience smoother and more enjoyable:
- Digital Scale: Precise measurements are key in baking. A scale helps ensure consistency with your homemade sourdough.
- Mixing Bowls: A few in various sizes are handy for mixing and fermenting.
- Bench Scraper: This tool is perfect for shaping your dough.
- Dutch Oven: Ideal for achieving that crispy crust we all love.
With these ingredients and tools, you’re well on your way to baking your first loaf of homemade sourdough! Don’t forget to embrace the process—it’s all part of the fun.
Step-by-step Preparation for Homemade Sourdough
Crafting your own homemade sourdough is an incredibly rewarding experience, and with these step-by-step instructions, you’ll soon have loaves that not only taste amazing but also fill your kitchen with the delightful aroma of freshly baked bread. Let’s dive into the essential steps you’ll follow to create your perfect batch!
Start with Your Sourdough Starter
Before we jump into mixing ingredients, let’s talk about your sourdough starter. This living culture of flour and water is the heart of your homemade sourdough. If you don’t have a starter yet, I encourage you to follow a guide on how to make your own. It’s easier than you think and requires just a bit of patience as the wild yeast develops.
If your starter has been sitting in the fridge, take it out and give it a good feed about 4-6 hours before you plan to bake. You want it bubbly and active. A healthy starter will rise significantly and have a pleasant tangy scent. Not sure if it’s ready? A simple test is the “float test.” If a small spoonful of your starter floats in water, it’s good to go!
Mixing the Dough
Now it’s time to mix! In a large mixing bowl, combine your active starter, flour, and water. Using your hand or a sturdy spatula, mix until no dry flour remains.
- Ingredients:
- 125g active sourdough starter
- 500g bread flour (you can mix in whole wheat for added flavor)
- 350g water (room temperature)
- 10g salt
Focus on ensuring a smooth consistency; it might feel a bit sticky — that’s perfectly normal! The blend should look shaggy, and no dry bits should remain.
Bulk Fermentation Process
Once mixed, it’s time for bulk fermentation, which is crucial for developing flavor and texture in your bread. Cover your bowl with a damp cloth or plastic wrap and let it rest at room temperature for 4 to 6 hours.
During this time, perform a few stretch-and-fold techniques every 30 minutes for the first couple of hours. This helps strengthen the gluten structure:
- Wet your hands to prevent stickiness.
- Grab a portion of the dough, stretch it upwards, and fold it over.
- Rotate the bowl and repeat until you’ve stretched all sides.
Shaping Your Dough
After bulk fermentation is complete, lay the dough out onto a lightly floured surface. Gently flatten it into a rectangle and shape it into a round loaf. Here’s a pro tip: for a tight surface and to lock in air, use the “panned shape” technique, pulling the dough toward you while tucking the edges under.
Let it rest for about 20 minutes before moving on to the next step. This rest, known as bench rest, helps to relax the gluten and makes shaping easier.
Final Proofing and Waiting
Now that your dough is shaped, it’s time for final proofing. Place your loaf in a proofing basket or bowl lined with a floured tea towel. Cover it with a cloth and let it rise for 1 to 3 hours, depending on the temperature of your kitchen. If your room is cool, you might want to consider placing your dough in a warmer spot or even in an oven with the light turned on.
Feeling impatient? You can also proof it in the fridge overnight for added flavor!
Baking the Sourdough
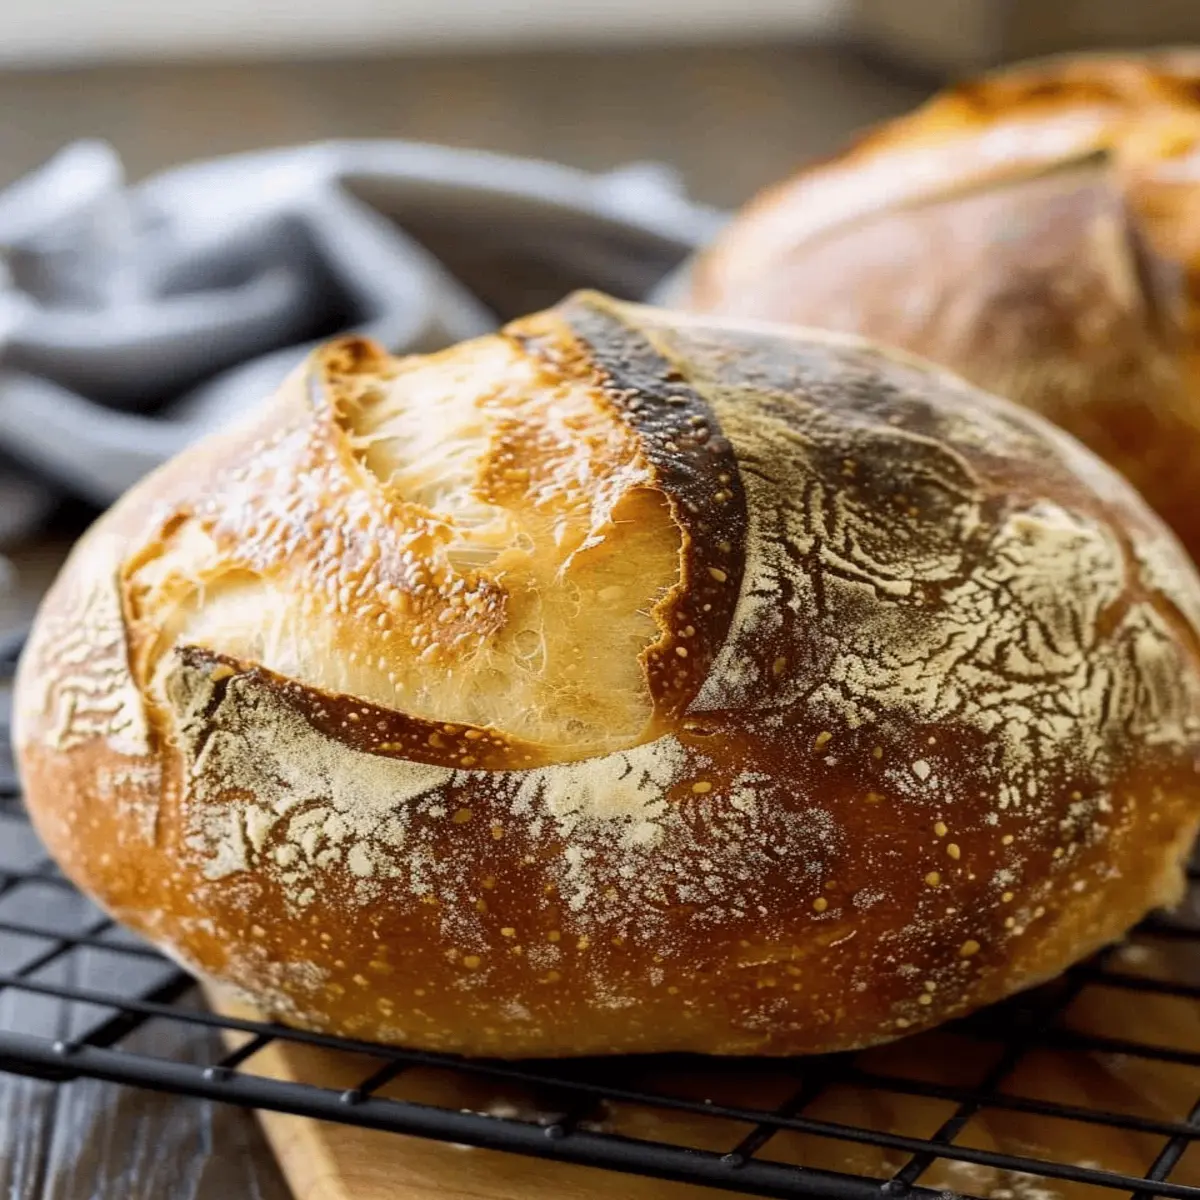
Preheat your oven to 450°F (232°C). If you have a Dutch oven, this is the perfect time to use it for that crispy crust we all love. Carefully transfer your loaf into the preheated pot and cover it with the lid. Bake for 30 minutes with the lid on, then remove the lid and bake for another 15-20 minutes until the crust is beautifully golden brown.
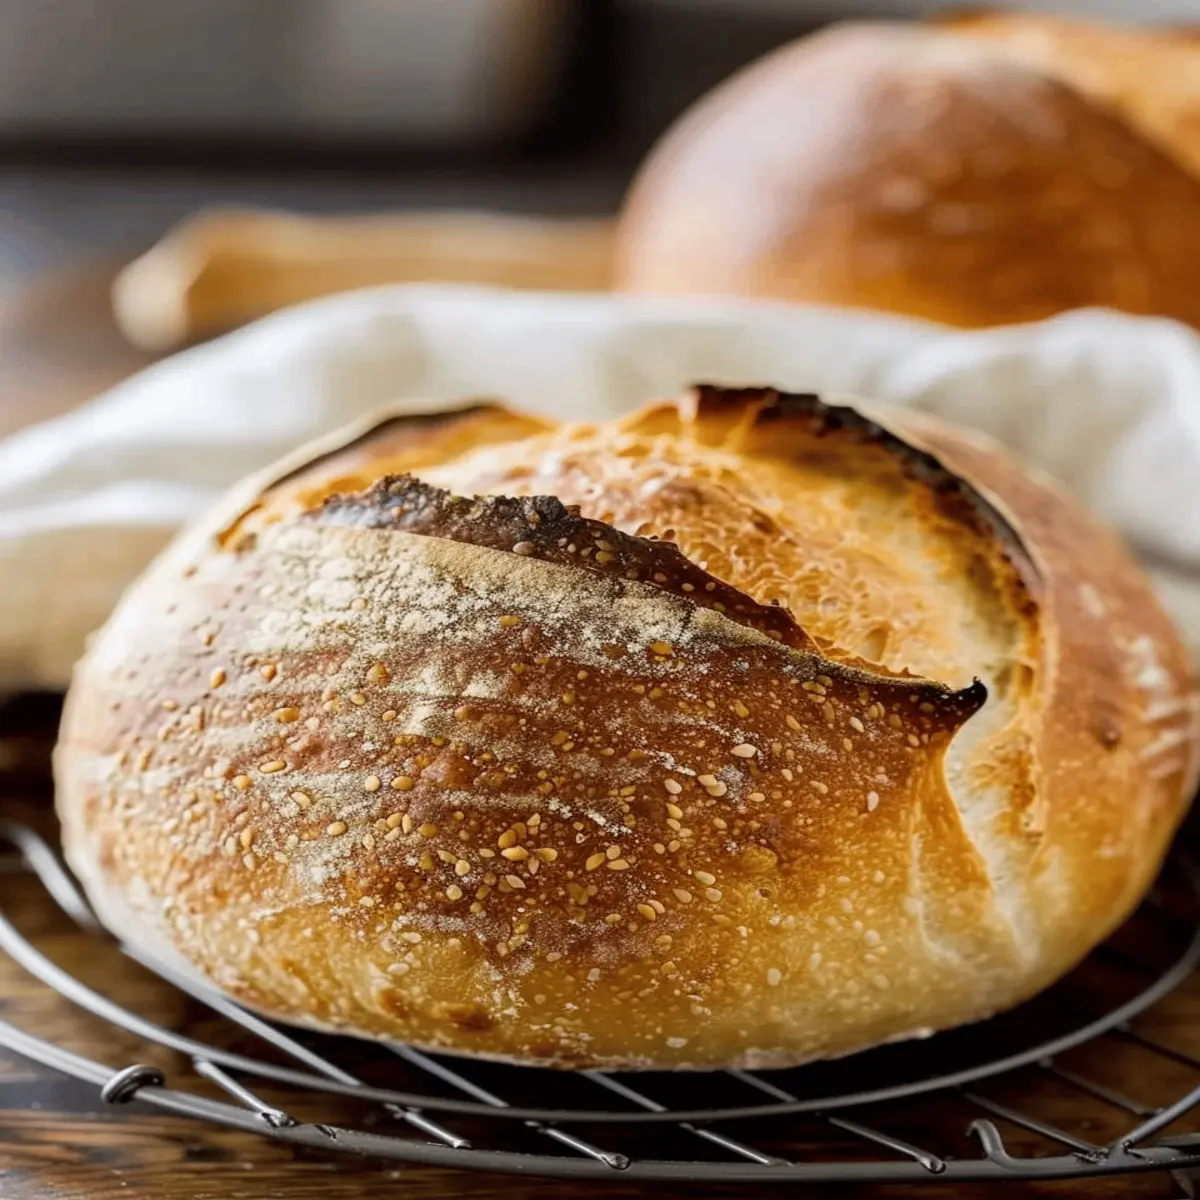
Once done, let your sourdough cool on a wire rack before slicing. Patience is key here, as cutting into hot bread can lead to gummy slices.
If you followed these steps, you’re in for a treat! Your homemade sourdough will likely become a staple in your kitchen, and you’ll love sharing it with friends and family.
For expert insights on sourdough baking techniques, don’t forget to check out resources like King Arthur Baking to enhance your skills further! Happy baking!
Variations of Homemade Sourdough
Sourdough with Herbs and Spices
Adding herbs and spices to your homemade sourdough can elevate its flavor profile significantly. Consider mixing in chopped fresh herbs like rosemary or thyme before baking. Not only do these additions enhance the aroma, but they also create a delightful pairing for soups and salads. A teaspoon of garlic powder or smoked paprika can impart a subtle kick, making your bread a unique twist on traditional sourdough.
Whole Wheat Sourdough
For a heartier loaf, venture into the world of whole wheat sourdough. This variation introduces a nutty flavor while boosting fiber content. Many choose to start with a blend of all-purpose flour and whole wheat—this way, you attain the best of both worlds. A study from the Journal of Nutrition emphasizes that whole grains can help reduce the risk of chronic diseases, making this variation a healthful choice. Adjust the hydration level slightly since whole wheat absorbs more water; your starter will thank you!
Sourdough with Seeds and Nuts
Imagine sinking your teeth into a crusty loaf infused with crunchy seeds and nuts! Adding sunflower seeds, walnuts, or sesame seeds not only enriches the texture but also packs the bread with healthy fats and protein. Just sprinkle your chosen mix into the dough during the final stretch and fold process. This little act can transform an ordinary loaf into something extraordinary. Plus, there’s nothing quite like the nutty fragrance wafting through your kitchen!
These homemade sourdough variations make it easy to experiment with flavors. Have you tried any of these options? Share your successes in the comments or check out King Arthur Baking for more inspiration!
Baking Notes for Homemade Sourdough
Common pitfalls and how to avoid them
Baking homemade sourdough can be tricky, especially if you’re new to it. Here are a few common pitfalls and how to sidestep them:
- Not feeding your starter regularly: This can lead to a weak starter. Aim for a consistent feeding schedule—ideally every 12 hours.
- Over or under-proofing the dough: Trust your instincts! The dough should be double in size and slightly domed. Look for bubbles on the surface; they’re a good sign.
- Incorrect baking temperature: An uneven oven can affect crust formation. Invest in an oven thermometer to ensure accurate temps.
How to troubleshoot your sourdough
Even experienced bakers hit snags. If your homemade sourdough doesn’t rise as expected, consider these troubleshooting tips:
- Flat bread: This might indicate over-proofing. Try reducing proof time next batch.
- Dense texture: Ensure proper gluten development by kneading enough or stretching and folding during bulk fermentation.
- Sour flavor: If it’s too tangy, reduce the fermentation time.
For peer-reviewed expertise on sourdough baking, check out resources like King Arthur Baking. Happy baking!
Serving Suggestions for Homemade Sourdough
Delicious toppings and pairings
There’s something magical about homemade sourdough. The crispy crust and chewy interior serve as the perfect canvas for countless toppings. For a classic breakfast, try spreading fresh avocado with a sprinkle of sea salt and red pepper flakes. If you’re feeling adventurous, top your slice with ricotta cheese, a drizzle of honey, and sliced figs.
For a hearty lunch, a simple slice adorned with a smear of sharp cheddar and some spicy mustard is delightful. Don’t forget to pair your sourdough with rich soups or salads, as the bread can effortlessly soak up delicious flavors, making every bite a gourmet experience.
Creative uses for leftover sourdough
Got leftover homemade sourdough? Don’t let it go to waste! Transform stale slices into crunchy croutons for salads or soups; just cut them up, toss with olive oil, garlic powder, and bake until golden.
You can also whip up a fabulous bread pudding; it’s a cozy dessert that’s both simple to make and delicious. Check out Serious Eats for some inventive sweet and savory bread pudding recipes. The options are endless—get creative!
Time Breakdown for Homemade Sourdough
When diving into the world of homemade sourdough, it’s essential to know how to manage your time. Let’s break it down:
Preparation Time
Getting everything ready will take approximately 30 minutes. This includes mixing your ingredients and shaping your dough. Take your time here—good preparation lays the groundwork for incredible flavor!
Fermentation Time
Fermentation is the heart of this recipe. Expect to invest about 12 to 24 hours, depending on your starter’s activity and the temperature of your kitchen. A longer fermentation can enhance the sourness and complexity, so don’t rush this step!
Baking Time
Once your dough has risen perfectly, the baking process will take around 30 to 45 minutes. Keep a close eye on your loaf; you want that nice golden-brown crust!
Total Time
In total, homemade sourdough takes about 13 to 25 hours to complete. While it may seem like a long process, much of it involves passive waiting, allowing the magic of fermentation to happen!
For more tips on skillful baking and how to maintain your sourdough starter, check out resources like King Arthur Baking or The Perfect Loaf. Let your culinary journey begin!
Nutritional Facts for Homemade Sourdough
Calories per slice
When it comes to homemade sourdough, knowing what you’re consuming can enhance your baking experience. One slice typically contains about 80-100 calories, depending on the ingredients and portion size. This makes it a versatile option—great for breakfast, lunch, or even as a snack!
Macronutrients breakdown
Understanding the macronutrient profile of homemade sourdough can help you enjoy it while keeping your diet balanced:
- Carbohydrates: Generally around 15-20 grams per slice, providing essential energy.
- Protein: You’ll find about 3-4 grams, which can support muscle health.
- Fats: A negligible amount, typically less than 1 gram, making it a heart-healthy choice.
This bread is not only delicious but can serve as a nutritious base for various toppings. For detailed nutritional guidelines, you might want to check out sources like the USDA FoodData Central or the NutritionData for deeper insights.
Baking your own sourdough not only brings joy but also allows you to control these nutritional aspects. Have you thought about pairing it with healthy spreads like avocado or hummus?
FAQs about Homemade Sourdough
What makes sourdough unique compared to other breads?
Homemade sourdough stands apart from other breads largely due to its natural fermentation process. Instead of commercial yeast, sourdough relies on wild yeast and lactic acid bacteria present in the environment. This unique blend not only gives sourdough its signature tangy flavor but also boasts health benefits. Studies have shown that sourdough fermentation can increase the bioavailability of nutrients (source: NCBI). Additionally, the slow fermentation allows for a more complex flavor and a chewier texture that many bread lovers adore.
Can I use all-purpose flour for sourdough?
Absolutely! While many sourdough recipes call for bread flour due to its higher protein content, using all-purpose flour is completely fine for homemade sourdough. It may yield a slightly different texture but will still produce a delicious loaf. For a balanced flavor and consistency, consider blending all-purpose flour with whole wheat or rye flour. This not only enhances flavor but also contributes to the overall nutritional profile.
How do I store homemade sourdough?
Storing your homemade sourdough properly is crucial to maintaining its freshness. Here are some tips:
- Room Temperature: If you plan to consume it within a few days, store your bread in a paper bag, then place it inside a cloth bag to allow for airflow while preventing it from drying out.
- Refrigeration: For longer storage, consider wrapping your sourdough tightly in plastic wrap and placing it in the fridge. Just be aware that this could alter the texture slightly.
- Freezing: For extended storage, slice your sourdough and freeze the pieces in an airtight container. This makes for easy defrosting—perfect for those busy weeknights!
Feel free to experiment with different storage methods to find the one that works best for you and your lifestyle! If you’re curious about the science behind fermentation or exploring more advanced techniques, check out resources from King Arthur Baking.
Conclusion on Homemade Sourdough
Embrace the Art of Baking Sullied with Love, Practice, and Patience
Baking homemade sourdough is not merely a process; it’s a journey filled with creativity and discovery. The beauty of crafting your own bread lies in the connection you form with the ingredients and the care you put into each loaf. It may take time to perfect your technique, but each attempt is a stepping stone toward becoming a confident baker.
Remember, the secret ingredient is always love—added with a sprinkle of patience. Don’t be discouraged by a few mishaps; even seasoned bakers encounter challenges. Resources like the King Arthur Baking Company offer valuable tips and troubleshooting guides that can aid your sourdough adventure. So, roll up your sleeves and enjoy the delightful process of transforming simple ingredients into delicious homemade sourdough. Happy baking!
PrintHomemade Sourdough: The Easiest, Most Irresistible Loaf Ever
Learn how to make the easiest homemade sourdough bread that is delicious and irresistible.
- Prep Time: 30 minutes
- Cook Time: 45 minutes
- Total Time: 6 hours 15 minutes
- Yield: 1 loaf 1x
- Category: Bread
- Method: Baking
- Cuisine: American
- Diet: Vegetarian
Ingredients
- 500 g bread flour
- 375 ml water
- 100 g active sourdough starter
- 10 g salt
Instructions
- In a large bowl, mix the flour and water until combined.
- Add the sourdough starter and salt, then knead the dough for about 10 minutes until smooth.
- Let the dough rise for 4-6 hours at room temperature, until doubled in size.
- Shape the dough into a round loaf and place it in a proofing basket.
- Let it rest for another 2 hours.
- Preheat the oven to 230°C (450°F) and place a Dutch oven inside to heat.
- Once preheated, carefully place the dough into the Dutch oven, cover, and bake for 30 minutes.
- Remove the lid and bake for an additional 15 minutes until golden brown.
- Let the bread cool on a wire rack before slicing.
Notes
- For a fluffier bread, use bread flour instead of all-purpose flour.
- Ensure your sourdough starter is active and bubbly.
Nutrition
- Serving Size: 1 slice
- Calories: 200
- Sugar: 0.5 g
- Sodium: 400 mg
- Fat: 1 g
- Saturated Fat: 0 g
- Unsaturated Fat: 0.5 g
- Trans Fat: 0 g
- Carbohydrates: 40 g
- Fiber: 1 g
- Protein: 6 g
- Cholesterol: 0 mg
Keywords: Homemade Sourdough