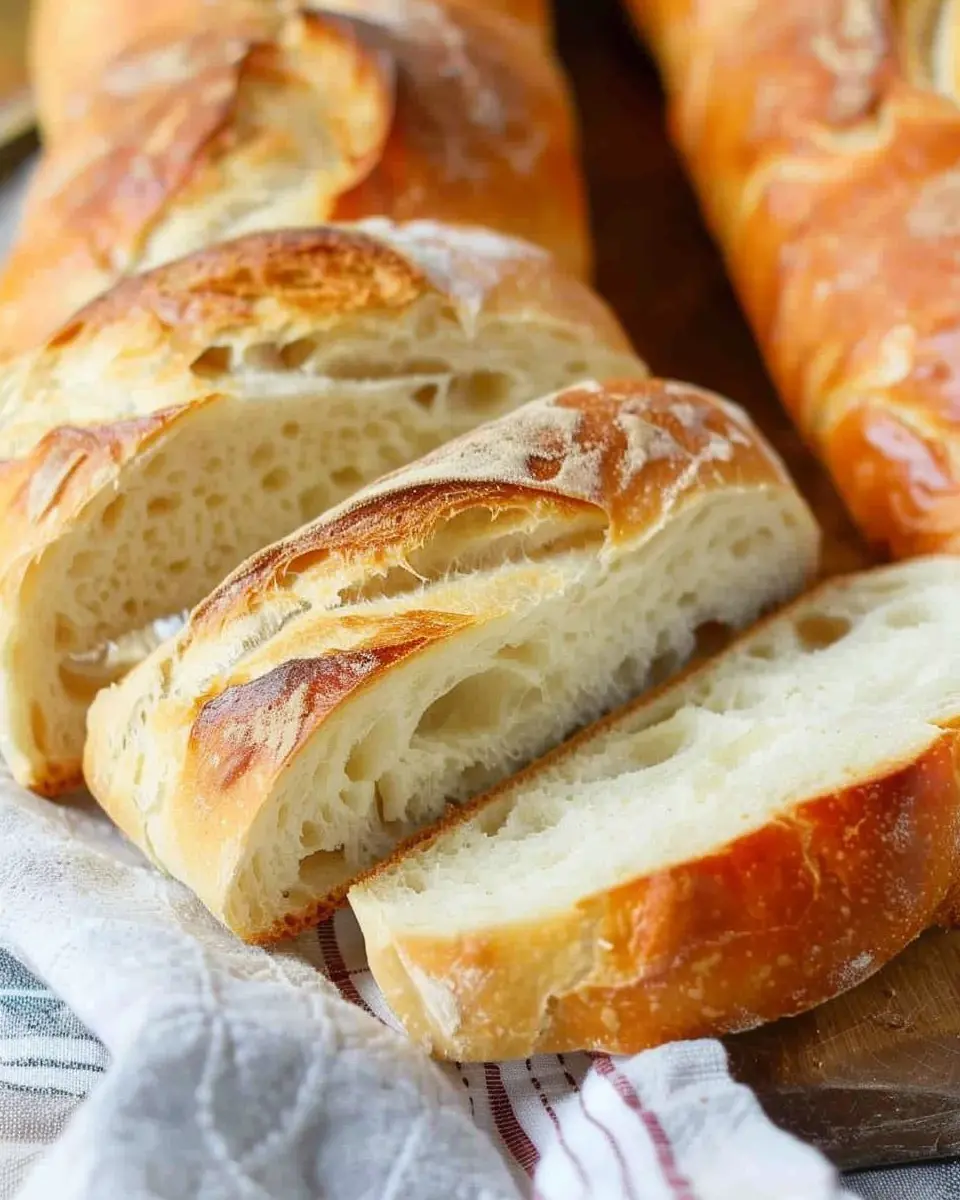
Introduction to Homemade French Bread
When it comes to baking, few things can compete with the sheer delight of homemade French bread. The moment you pull a loaf out of the oven, the smell wafting through your kitchen is simply irresistible. But why should you choose to make your own French bread instead of picking up a loaf from the store? Let’s dive into the wonderful world of baking and explore the reasons that will inspire you to roll up your sleeves and get into the kitchen.
Why Homemade French Bread?
First off, there’s something profoundly satisfying about producing something with your own hands. There’s a special connection to your food when you create it from scratch, and nothing says love like a well-baked loaf of bread. Plus, homemade bread is free from preservatives and artificial flavors often found in store-bought alternatives, making it a healthier option.
Did you know that making your own bread can be a great way to save money? According to a report by the Bureau of Labor Statistics, the price of bakery goods has been steadily increasing. Why not channel that spending into something rewarding, where you also get to enjoy fresh, crusty baguettes any day of the week?
A Few Merits of Baking Your Own French Bread
- Control Over Ingredients: You can choose high-quality flour and other natural ingredients that suit your dietary preferences.
- Customization: Want to add herbs, garlic, or even seeds? The possibilities are endless! Picking your mix-ins adds a personal touch.
- Skill Development: Bread making is an art that enhances your culinary skills over time. The more you practice, the better you’ll become.
In a world where convenience often trumps quality, taking the time to create your own homemade French bread serves as a refreshing reminder of craftsmanship. If you’re unsure where to start, there are countless resources available, like this article from King Arthur Baking that can guide you through the basics.
So, are you ready to embark on this delicious journey? Grab your apron, gather your ingredients, and let’s make something amazing together!
Ingredients for Homemade French Bread
Creating your own Homemade French Bread can be a rewarding experience, and it’s surprisingly simple! Here’s what you’ll need to get started:
- All-Purpose Flour: About 4 cups for that perfect chewy texture. It’s the backbone of your bread.
- Active Dry Yeast: 2 teaspoons, which helps the bread rise beautifully. Always check the expiration date for best results!
- Warm Water: Approximately 1 ½ cups. Aim for around 110°F; it should feel warm to the touch.
- Sugar: 1 tablespoon to feed the yeast and enhance flavor.
- Salt: 1 ½ teaspoons. This is essential for seasoning and also helps control the yeast’s action.
- Olive Oil: 2 tablespoons for added richness and moisture.
Take a moment to gather these ingredients, and you’ll be well on your way to enjoying fresh, warm bread right from your oven. If you’re curious about the science of yeast and how it works, feel free to check out resources like King Arthur Baking for more insights. Remember, bread-making is as much about the process as it is about the end result—so enjoy every step!
Step-by-step Preparation of Homemade French Bread
When it comes to baking homemade French bread, the process is as delightful as the aroma wafting from your oven. From activating the yeast to the final golden-crusted loaf, each step builds towards that satisfying moment when you take your first bite. Let’s dive in!
Activate the yeast
The first step in your homemade French bread journey is to bring your yeast to life. You’ll need:
- 1 packet of active dry yeast (about 2 1/4 teaspoons)
- 1 cup of warm water (around 110°F/43°C)
Why activate the yeast? It’s essential for creating those lovely bubbles in your bread. Mix the yeast with warm water in a small bowl. Let it sit for about 5–10 minutes until it becomes frothy. This simple activation tells you that your yeast is alive and ready to work its magic!
Mix the flour and salt
While your yeast is waking up, grab:
- 4 cups of all-purpose flour
- 1 tablespoon of salt
In a large mixing bowl, combine the flour and salt. Pro tip: Make sure to mix thoroughly! Salt can inhibit yeast activity if it comes into direct contact, so blend it well to create an even distribution. Your kitchen should start to feel a bit like a cozy bakery already.
Combine and knead the dough
Now, it’s time to join forces!
- Pour the frothy yeast mixture into your flour and salt combination.
Stir gently until it forms a rough dough, then transfer it to a floured surface. Here comes the fun part: kneading! With your hands, push the dough away from you, fold it back over itself, and turn it a quarter turn. Repeat this process for about 8–10 minutes. The goal is a smooth, elastic dough. If you need a quick refresher on kneading techniques, check out this helpful guide.
First rise of the dough
After all that hard work, it’s time to let your dough rest. Place it in a lightly greased bowl, cover it with a damp cloth or plastic wrap, and let it rise in a warm area for about 1–2 hours. You want it to double in size!
While waiting, consider the science behind it: yeast consumes sugars and releases carbon dioxide, causing the dough to rise. You could even entertain yourself by experimenting with different bread recipes during this time!
Shape the loaves
After your dough has risen beautifully, it’s time to shape it into loaves.
- Turn the dough out onto a floured surface.
- Divide it in half and gently flatten each half into a rectangle.
Roll them up tightly, pinch the seams, and tuck the ends under. Now, you have two lovely loaves ready for their second rise!
Second rise before baking
Place your shaped loaves onto a baking sheet lined with parchment paper, leaving some space between them. Cover again with a damp cloth, and let them rest for about 30–45 minutes. You want them to puff up slightly; this creates the perfect texture for your homemade French bread.
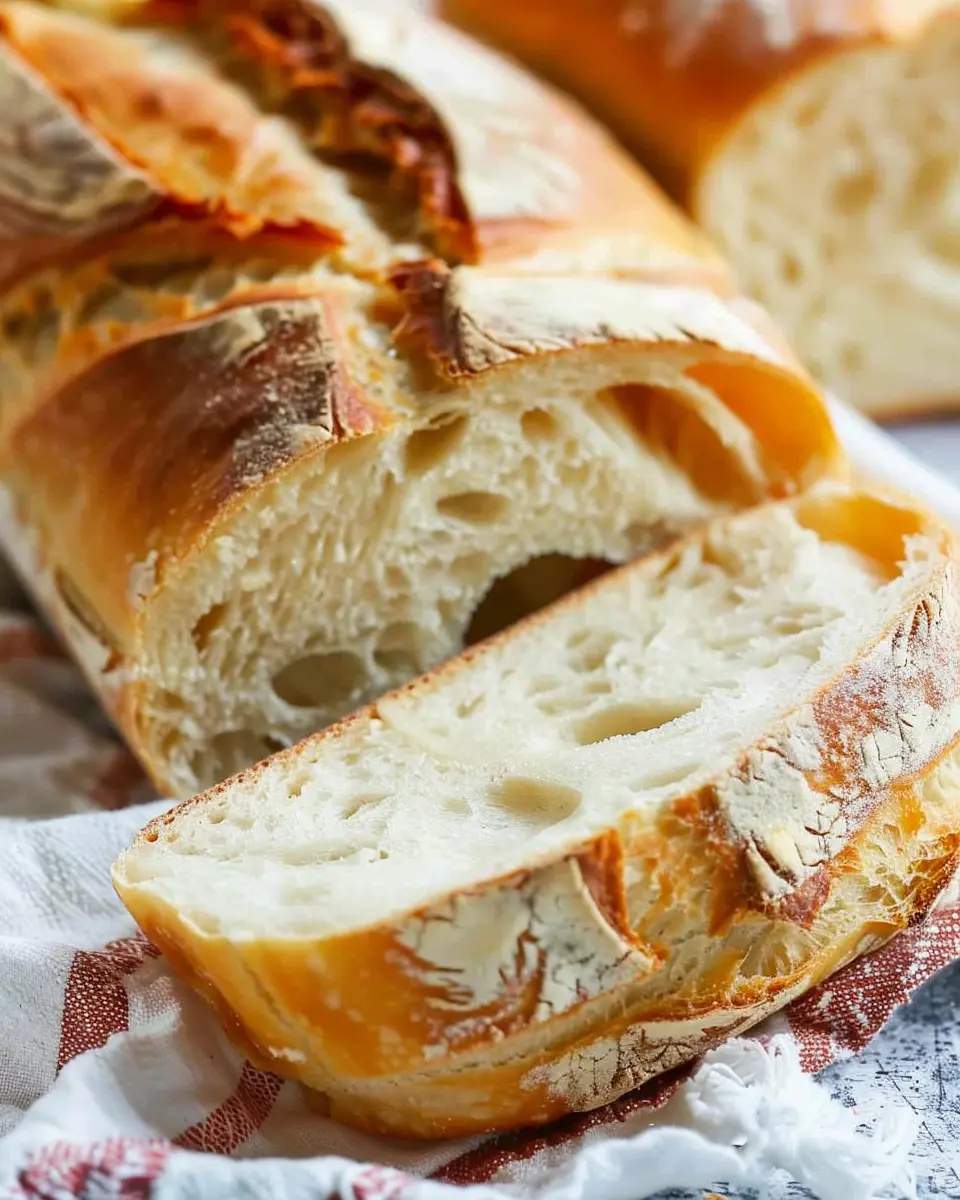
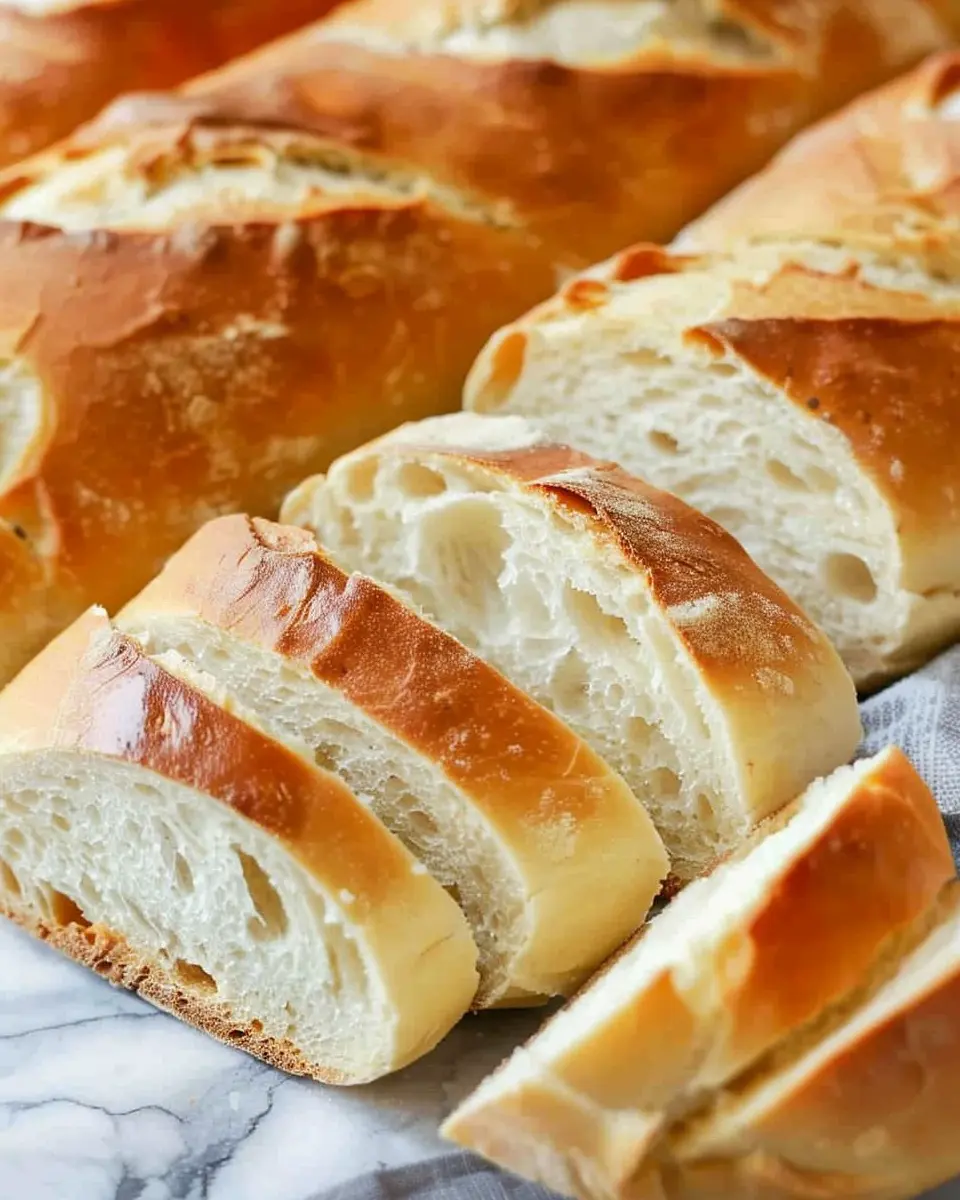
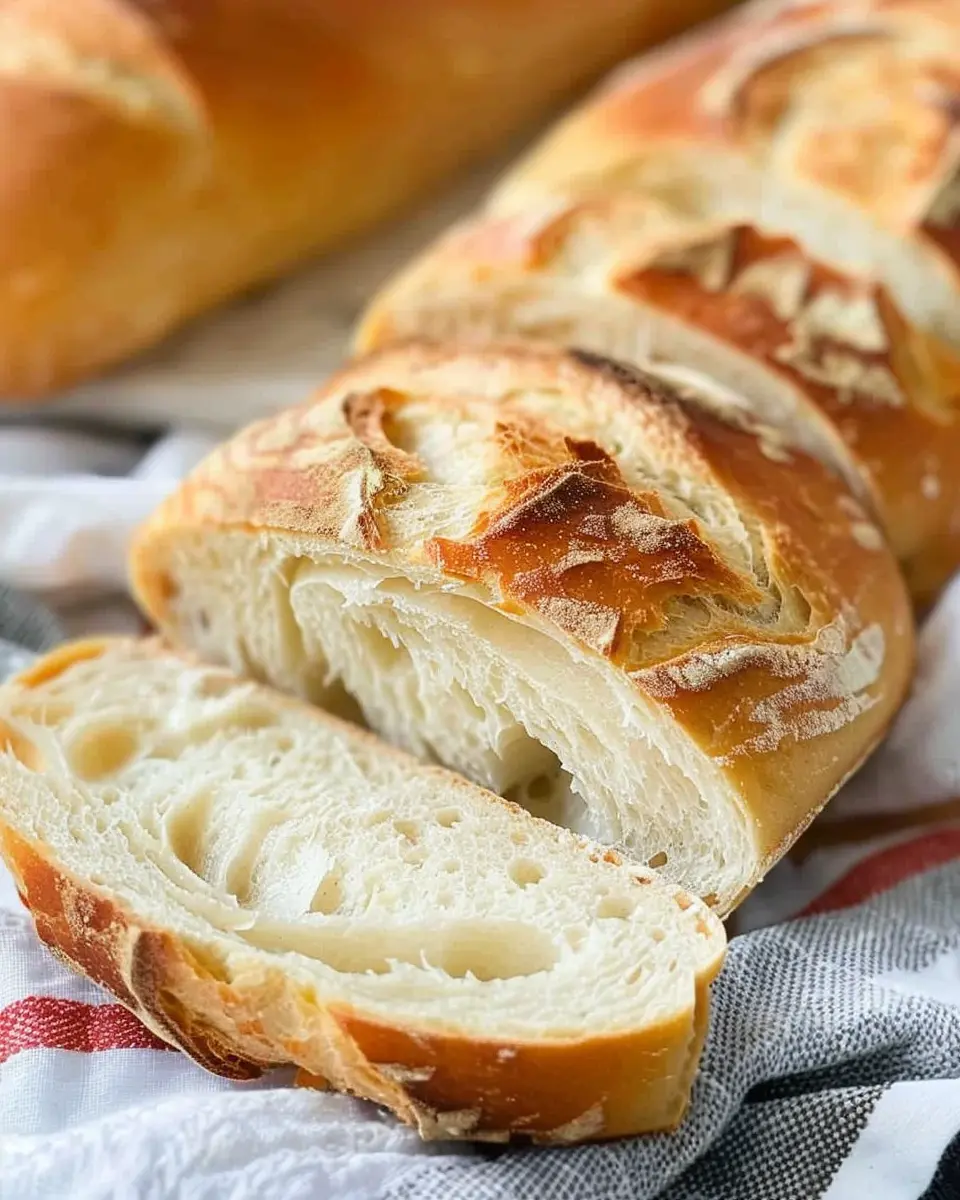
Bake the loaves
Finally, it’s time for the grand finale! Preheat your oven to 375°F (190°C). For a crispy crust, you can create steam in the oven by placing a pan with hot water on the bottom rack during baking.
Once warmed, bake your loaves for 25–30 minutes until they’re golden brown and sound hollow when tapped on the bottom. Let them cool on a wire rack, and then prepare for that irresistible aroma that signals a big win in the kitchen!
Voilà! You’ve crafted your very own homemade French bread. Slice, share, and savor the fruits of your labor. Don’t forget: a dollop of your favorite spread or a side of Turkey Bacon can elevate this bread to heavenly status. Happy baking!
Variations of Homemade French Bread
Herb-infused French Bread
If you’re looking to elevate your homemade French bread experience, why not infuse it with a burst of flavors? Herb-infused variations offer a delightful twist that can complement any meal. Simply add a mix of herbs such as rosemary, thyme, or basil into your dough.
- Garlic and Herb: Incorporate minced garlic and Italian seasoning for a Mediterranean flair.
- Green Herb Blend: Mix in fresh parsley, chives, and dill for a vibrant, savory loaf.
The aromas that waft through your kitchen while it bakes will make your neighbors wish they were invited over for dinner! For stunning recipes, check out this expert guide on herb combinations.
Whole Wheat French Bread
Want a healthier and hearty version of traditional homemade French bread? Whole wheat French bread is a fantastic alternative that still offers that beloved crusty exterior and fluffy interior. By using whole wheat flour, you’re not only adding fiber to your diet but also a nutty flavor that pairs perfectly with spreads.
- Nutty Twist: You can even mix half whole wheat and half white flour for a balanced taste.
- Add Seeds: Sprinkle in some sunflower or flax seeds for a lovely crunch and nutritional boost.
Making whole wheat French bread doesn’t require much adjustment to your usual recipe; just substitute the flour and watch your loaf transform into a health-conscious delight. For more info on the benefits of whole grains, take a look at the Whole Grains Council.
These variations showcase just how versatile homemade French bread can be. Which version are you most excited to try?
Cooking Tips and Notes for Homemade French Bread
Crafting Homemade French Bread is a rewarding experience that fills your kitchen with delicious aromas. Here are some tips to elevate your bread-making game:
Use Quality Ingredients
Start with high-quality flour and fresh yeast. This can greatly impact the texture and flavor of your bread. Organic bread flour, for example, provides excellent gluten structure for that perfect chewy crust.
Hydrate Your Dough
A higher hydration dough leads to a lighter, airier loaf. Aim for about 70% water to flour ratio. If you’re used to stiff doughs, try gradually increasing the liquid until you find your sweet spot.
Don’t Rush the Rising
Allow your dough to rise slowly. A long fermentation not only develops the flavor; it also improves texture. If you have time, consider a cold rise in the fridge overnight.
Steam for Crust Perfection
To achieve that golden, crispy crust, introduce steam into your baking environment. Place a pan of hot water in the oven while your bread bakes, or use a spray bottle to mist the oven walls just before closing the door.
Experiment with Add-Ins
Feel free to personalize your Homemade French Bread by adding herbs, cheese, or even sun-dried tomatoes. Just remember to adjust your water content to compensate for the additional ingredients.
For more in-depth bread-making tips, check out resources from The Kitchn or BBC Good Food. Happy baking!
Serving Suggestions for Homemade French Bread
When you’ve gone through the delightful process of crafting your own Homemade French Bread, it’s time to think about the myriad ways to enjoy it! This bread isn’t just a sidekick; it’s a star that can enhance so many meals.
Classic Pairings
-
With Soups and Stews: Picture a warm bowl of creamy tomato soup. The crusty exterior of your Homemade French Bread makes the perfect dipper. For a more hearty option, consider a classic beef stew.
-
Breakfast Bouquets: Why not elevate your breakfast? Slice your bread thinly, toast it, and top it with turkey bacon and avocado. Simple, fresh, and packed with flavor—perfect for busy mornings.
Sandwich Perfection
Your Homemade French Bread also shines when turned into sandwiches. Try it with:
- Chicken ham and light mustard
- Fresh mozzarella, basil, and tomatoes for a Caprese twist
Creative Snacks
Feeling peckish? Slices of this bread topped with hummus or a light spinach dip make for an amazing snack. For a sweet touch, spread a bit of honey butter or your favorite jam.
Remember, the beauty of Homemade French Bread lies in its versatility. You can check out The Kitchn for even more inspiration! Experiment, and let your creativity shine in the kitchen—you won’t be disappointed!
Time Breakdown for Homemade French Bread
Preparation time
Making Homemade French Bread starts with about 20 minutes of preparation. You’ll gather ingredients like flour, yeast, and salt, then mix them to form a dough. This is the creative part where you can feel like a true artisan baker!
Rising time
The dough needs to rise for approximately 1 to 2 hours. This allows the yeast to work its magic, creating those beautiful air bubbles. Remember to cover the dough with a damp cloth to keep it warm and cozy.
Baking time
Once the dough has risen, baking will take around 25 to 30 minutes. The aroma of freshly baked bread is simply irresistible, and it’s during this time that your kitchen transforms into a bakery haven.
Total time
In total, you’re looking at about 2 to 3 hours from start to finish. This includes preparation, rising, and baking. While it may seem like a lengthy process, most of that time is hands-off, allowing you to catch up on other things while your Homemade French Bread comes to life.
For more tips on baking bread, you can check out resources from the Bread Bakers Guild or King Arthur Baking. Happy baking!
Nutritional Facts for Homemade French Bread
When indulging in homemade French bread, it’s essential to understand its nutritional profile so you can enjoy it mindfully. Here’s a breakdown of what you’re sampling.
Calories
A single slice of homemade French bread typically contains around 80-100 calories. This makes it a versatile option that adds flavor without overwhelming your meal.
Carbohydrates
In terms of carbohydrates, expect about 15 grams per slice. This provides a quick energy source, perfect for your busy day, but make sure to pair it with proteins or healthy fats for balanced nutrition.
Protein
Lastly, the protein content is relatively low, averaging about 2-3 grams per slice. While homemade French bread isn’t a protein powerhouse, it’s great for absorbing the nutrients from accompanying dishes.
For more in-depth nutritional insights, consider visiting the USDA FoodData Central or Nutrition Data.
FAQs about Homemade French Bread
Can I use instant yeast instead of active dry yeast?
Absolutely! Using instant yeast is a fantastic option when making homemade French bread. In fact, some bakers prefer it for its convenience. You can typically substitute instant yeast for active dry yeast in a 1:1 ratio, which means if your recipe calls for 2 teaspoons of active dry yeast, just use 2 teaspoons of instant yeast. The advantage? Instant yeast doesn’t require proofing in water, allowing you to mix it straight into the dry ingredients. This can save you a bit of time—perfect for those busy weeknights.
How do I store homemade French bread?
To keep your homemade French bread fresh, store it in a cool, dry place. Avoid refrigerating it, as that can lead to a stale texture. Here are some tips:
- Room Temperature: Wrap your bread in a clean kitchen towel or place it in a paper bag to maintain crustiness for about 1-2 days.
- Plastic Bags: If you prefer a softer crust, a plastic bag is fine, but keep in mind it may lose that delightful crunch.
For more expert tips on bread storage, check out resources like Baking Science.
Can I freeze homemade French bread?
Yes, you can freeze homemade French bread! This is a great way to enjoy your delicious creation later. Here’s how to do it effectively:
- Cool it: Allow your bread to cool completely before freezing.
- Wrap tightly: Use plastic wrap and then place it in a freezer-safe bag or container to prevent freezer burn.
- Thawing: When you’re ready to enjoy it, simply thaw the bread at room temperature or pop it in the oven at 350°F for about 10-15 minutes for that freshly-baked texture.
By following these tips, you can savor the aroma and flavor of homemade French bread any time you wish!
Conclusion on Homemade French Bread
There’s something truly special about Homemade French Bread. The warm aroma filling your kitchen, the crispy crust, and that soft, fluffy interior make it a delightful addition to any meal. Whether you’re pairing it with a hearty soup or creating a scrumptious sandwich filled with Turkey Bacon and Chicken Ham, this recipe is versatile enough to fit any occasion.
To make the most out of your baking experience, don’t hesitate to try different variations or toppings like herbs or cheeses. Remember, practice makes perfect! For more inspiration, check out this guide on baking techniques. So roll up your sleeves, enjoy the process, and savor the mouthwatering results of your Homemade French Bread!
PrintHomemade French Bread: The Best Recipe for Fresh Loaves at Home

Learn how to make delicious homemade French bread with this easy recipe that yields fresh loaves perfect for any occasion.
- Prep Time: 20 minutes
- Cook Time: 30 minutes
- Total Time: 1 hour 50 minutes
- Yield: 2 loaves 1x
- Category: bread
- Method: baking
- Cuisine: French
- Diet: vegetarian
Ingredients
- 4 cups all-purpose flour
- 1 ½ cups warm water
- 2 ¼ teaspoons active dry yeast
- 2 teaspoons salt
- 1 tablespoon sugar
Instructions
- In a large bowl, mix warm water with sugar and yeast; let sit for 5 minutes until foamy.
- Add flour and salt to the yeast mixture. Stir until a dough forms.
- Knead the dough on a floured surface for about 10 minutes until smooth.
- Place the dough in a greased bowl, cover, and let rise for 1 hour or until doubled in size.
- Punch down the dough and divide it into two. Shape into loaves.
- Place the loaves on a baking sheet and let rise for another 30 minutes.
- Preheat the oven to 375°F (190°C).
- Bake for 25-30 minutes until golden brown.
- Cool on a wire rack before slicing.
Notes
- For a crustier loaf, place a pan of water in the oven while baking.
Nutrition
- Serving Size: 1 slice
- Calories: 130
- Sugar: 1g
- Sodium: 150mg
- Fat: 1g
- Saturated Fat: 0g
- Unsaturated Fat: 0g
- Trans Fat: 0g
- Carbohydrates: 27g
- Fiber: 1g
- Protein: 4g
- Cholesterol: 0mg
Keywords: Homemade French Bread