
Introduction to Dutch Oven Bread Recipe
There’s something truly magical about the aroma of freshly baked bread wafting through your home. It has a way of transforming any space, making it feel warm and inviting. But what makes homemade bread so irresistible? Is it the heavenly crust, the soft, pillowy interior, or perhaps the satisfaction of creating something delicious from scratch? The answer lies in all of these and more!
When you embark on making your own bread, you not only engage your senses but also tap into a time-honored tradition that connects you to generations past. According to experts at the Bread Lab, the process of baking bread can even boost your mood! It can be incredibly rewarding to knead the dough, allow it to rise, and watch it transform into loaves that you can share with friends and family or savor alone.
Discover the Power of Dutch Oven Cooking
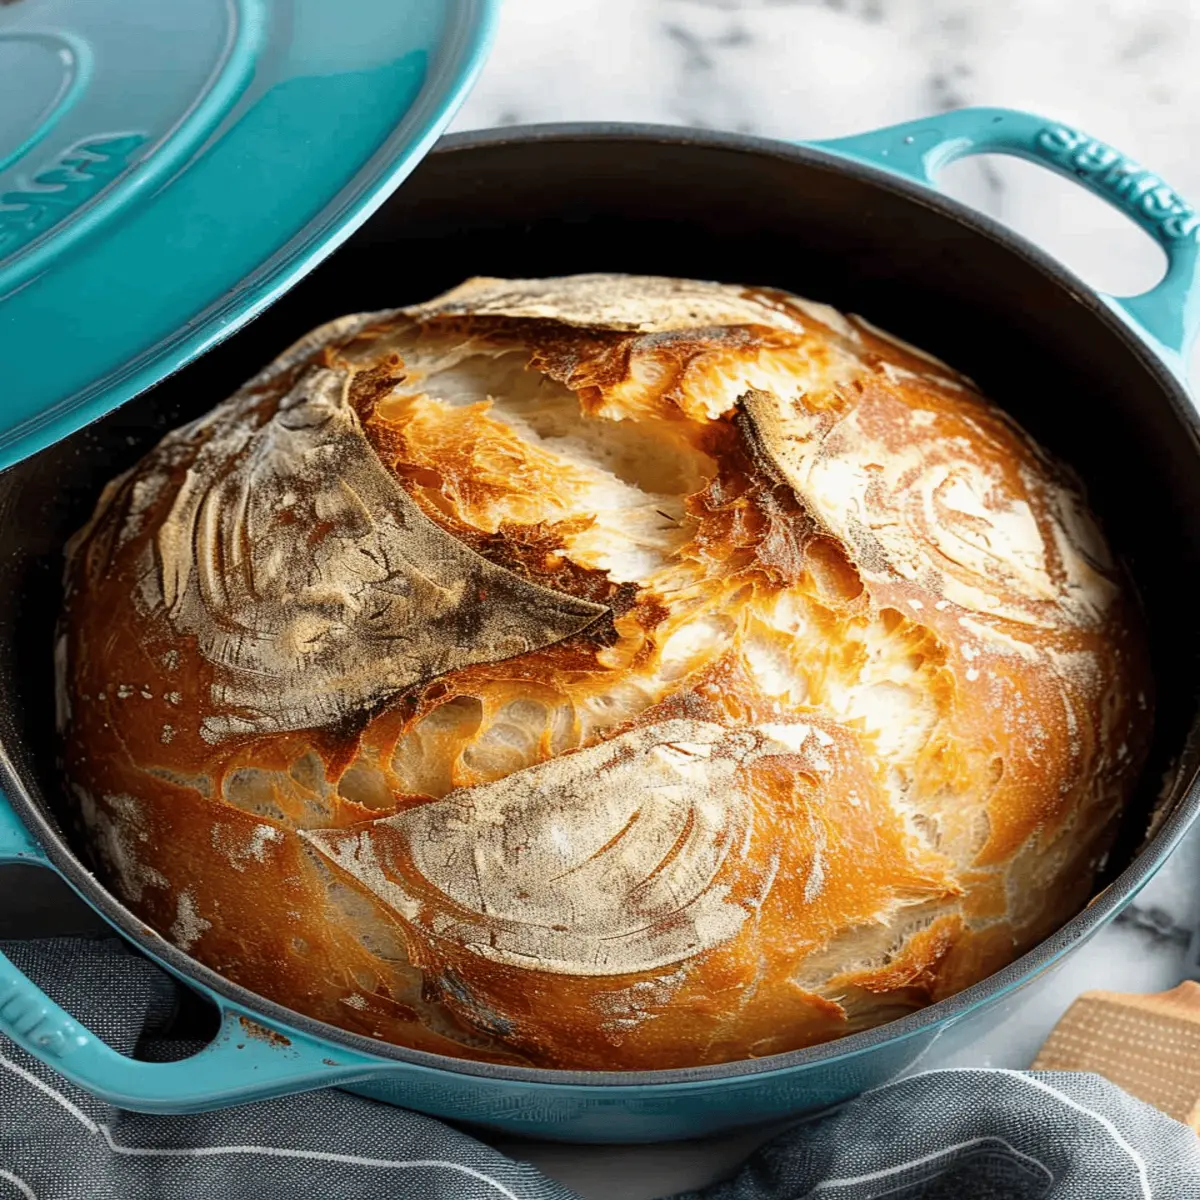
Now, let’s talk about how a Dutch oven elevates your baking game. This trusty kitchen companion excels not just with stews and roasts but is a game-changer for those golden loaves of bread as well. The heavy cast iron retains heat evenly and creates that perfect steam environment, allowing your bread to rise beautifully and develop a crispy crust. And did you know that Dutch ovens are making a comeback in modern kitchens? They’re not just practical but also stylish enough to double as serveware at your dinner table.
So, if you’re looking to impress your friends with a homemade bread masterpiece, this Dutch oven bread recipe is your golden ticket. It’s simple enough for a beginner, yet the results are so impressive that even seasoned bakers would be proud to serve it. The best part? You don’t need to be perfect; each loaf tells a story and reflects your unique style.
Are you ready to dive into the world of baking? Grab your ingredients, and let’s whip up some amazing Dutch oven bread! Whether you’re baking for yourself or planning a cozy gathering, this is a skill that you’ll treasure. For more tips on bread-making, check out resources from King Arthur Baking or The Fresh Loaf, where passion for bread runs deep.
Ingredients for Dutch Oven Bread
Essential ingredients for a basic bread recipe
Creating a delicious Dutch oven bread recipe starts with the right essentials. To get that perfect crust and fluffy interior, you’ll need the following ingredients:
- Flour: All-purpose flour works beautifully, giving your bread a wonderful structure.
- Water: Lukewarm water activates the yeast, allowing for that delightful rise.
- Yeast: Use active dry or instant yeast; both will give you reliable results.
- Salt: Essential for flavor, it also strengthens the dough.
These four ingredients form the backbone of your bread. You’ll be amazed at how something so simple can yield such incredible flavors and textures!
Optional add-ins for extra flavor
Feeling adventurous? Enhance your Dutch oven bread with some optional add-ins! Consider these flavorful options:
- Herbs: Dried rosemary or thyme can add a whole new dimension.
- Cheese: Shredded cheese mixed in or sprinkled on top creates a savory finish.
- Seeds: Poppy or sesame seeds offer crunch and character.
Experimenting with these add-ins not only personalizes your bread but also makes baking even more fun. For more bread-making tips, check resources like the King Arthur Baking Company. Happy baking!
Step-by-Step Preparation of Dutch Oven Bread
Making homemade bread can sound a bit intimidating, but with this Dutch oven bread recipe, you’ll find it’s quite simple—especially if you follow these steps! Let’s roll up our sleeves and get started on that golden crusty loaf.
Gather Your Ingredients
Before we dive into the mixing and kneading, it’s essential to have everything ready. Here’s what you’ll need:
- 4 cups all-purpose flour
- 2 teaspoons salt
- 1 teaspoon sugar
- 1.5 teaspoons instant yeast (also referred to as rapid-rise yeast)
- 1.5 cups warm water (around 100°F / 38°C)
Having everything in one place makes the process smoother and even more enjoyable. So, get your measuring cups out and your ingredients lined up.
Mix the Dry Ingredients
Now that you’re all set, grab a large mixing bowl and combine the following dry ingredients:
- All-purpose flour
- Salt
- Sugar
- Instant yeast
Mix them together well with a whisk or a fork—this will ensure that the yeast distributes evenly throughout the flour. Why do we mix the yeast separately? Good question! This step helps prevent salting or sugar from inhibiting the yeast’s activity, according to King Arthur Baking.
Combine Wet and Dry Ingredients
Next, it’s time to introduce our wet ingredients to the mix. Pour in the warm water and use a wooden spoon or your hands to combine everything until it forms a shaggy dough. Don’t worry if it seems a bit sticky; that’s completely normal! The hydration is what gives the bread its characteristic texture.
Knead the Dough
Although you might imagine a full workout in kneading, for this recipe, you’ll just need a light touch. Transfer your dough onto a well-floured surface, and gently knead it for about 5-10 minutes. The goal here is to develop gluten, which will help give your bread that amazing chewy texture.
First Rise
Place the dough into a lightly oiled bowl, cover it with a kitchen towel, and let it rise in a warm spot. You want it to double in size, which usually takes about 1 to 2 hours. Here’s where the magic happens!
Shape the Dough
After the dough has risen, gently punch it down to release air bubbles. Turn the dough onto your floured surface and shape it into a ball. If you’d like a slightly different look, you can choose to shape it into a loaf as well.
Second Rise
Let your formed dough rest for another 30 minutes on the counter while you prepare for baking. Cover it again—you want it to rise just a bit more. This also improves the texture of the final loaf.
Preheat the Dutch Oven
During the second rise, it’s important to preheat your Dutch oven. Take the lid off and place it in the oven at 450°F (230°C) for about 30 minutes. This is crucial for achieving that lovely crust on your Dutch oven bread. The hot surface will help create steam, making your bread rise beautifully.
Bake the Bread
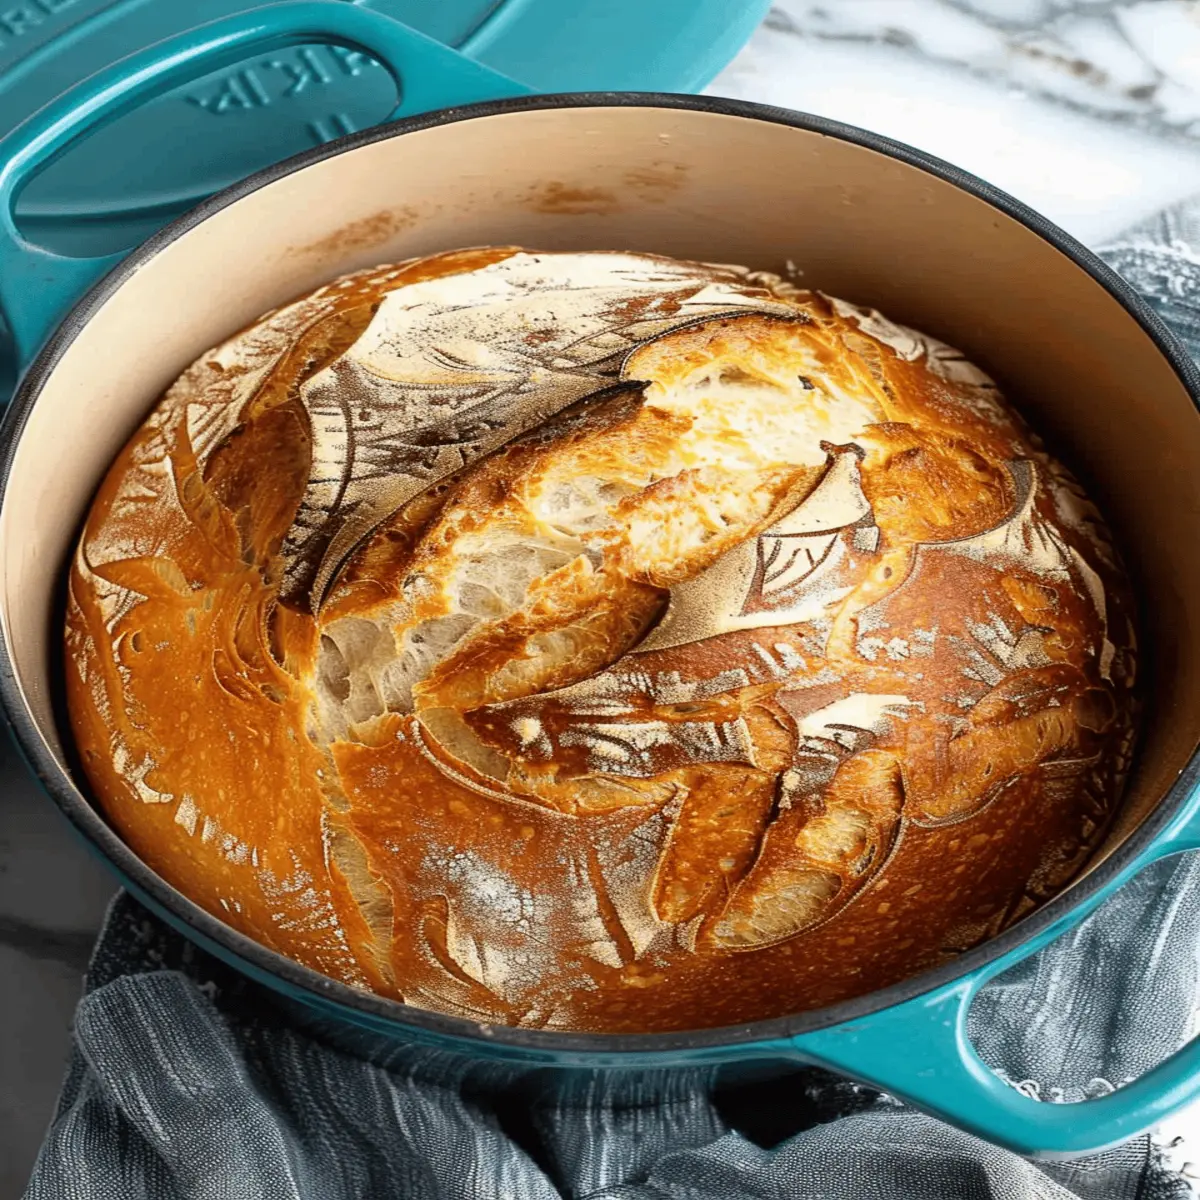
Once preheated, carefully remove the Dutch oven. Place the dough inside (you can sprinkle some cornmeal to prevent sticking if you wish). Cover with the lid and bake for 30 minutes. After that, take off the lid and bake for an additional 10 to 15 minutes until it’s gloriously golden brown. Your kitchen will smell heavenly!
Cool and Enjoy
The final step is perhaps the hardest: waiting! Let the bread cool on a wire rack for at least 30 minutes before slicing. This waiting time allows the inside to set properly. Once cool, slice and enjoy!
Bread-making isn’t just about eating; it’s an experience. And with this Dutch oven bread recipe, you’ll not only impress yourself but also anyone lucky enough to share a meal with you. What’s your favorite topping for homemade bread? Let me know!
Variations on Dutch Oven Bread
When it comes to exploring different flavors and textures, your Dutch oven bread recipe is just the beginning. With a little creativity, you can transform this simple loaf into something truly magical. Here are a few variations to get your culinary juices flowing.
Infuse with Herbs and Cheese
Imagine slicing into a warm loaf, only to find pockets of melted cheese and fragrant herbs. For this savory twist, consider adding:
- Fresh herbs like rosemary, thyme, or basil
- Shredded cheese such as cheddar, mozzarella, or feta
To make it even more indulgent, sprinkle in some garlic powder or crushed red pepper flakes. This variation is perfect for a cozy dinner or as a gourmet sandwich base.
Whole Wheat Dutch Oven Bread
For those seeking a healthier alternative, whole wheat bread delivers nutrition without sacrificing taste. Simply swap out half or all of the all-purpose flour in your Dutch oven bread recipe for whole wheat flour. This will yield a denser bread rich in fiber, and it pairs wonderfully with soups or hearty stews. Plus, whole grains have been linked to improved heart health—who wouldn’t want that?
Sweet Bread with Fruits and Nuts
If you’re in the mood for decadent treats, try incorporating:
- Dried fruits like cranberries, apricots, or raisins
- Nuts such as walnuts or pecans
A hint of cinnamon or cardamom can take your sweet bread to the next level. This variation is delightful for breakfast or as a snack, satisfying both sweet and hearty cravings.
Be sure to check out King Arthur Baking for more inspiration on these flavorful options. Each of these variations not only enhances your Dutch oven bread recipe but also opens doors to culinary experimentation you’ll love!
Cooking Tips and Notes for Dutch Oven Bread
Common Mistakes to Avoid
When trying your hand at this Dutch oven bread recipe, there are a few pitfalls to steer clear of:
- Over or Under Proofing: Make sure to give your dough enough time to rise. Underproofing leads to dense bread, while overproofing can cause it to collapse. A good rule of thumb is to let it rise until it doubles in size.
- Ignoring Temperature: Baking bread is a science. The internal temperature should ideally be around 200°F (93°C) when fully baked. Use a kitchen thermometer for accuracy!
- Skipping the Lid: The lid of the Dutch oven traps steam, creating that signature crust. Don’t remove it too early during the baking process.
Ensuring the Perfect Crust
Want that crusty outer layer that makes every bite divine? Here’s how:
- Preheat the Dutch Oven: A hot pot is essential for a great crust. Preheat it while you prepare your dough.
- Use Steam: To create the perfect environment for crust development, consider adding a small pan of water beneath your Dutch oven or misting the inside with water just before you close the lid.
- Final Bake: For an extra-crispy finish, let your bread bake uncovered for the last 10-15 minutes.
Happy baking! For more insights, you can explore resources like King Arthur Baking and Serious Eats for expert tips.
Serving Suggestions for Dutch Oven Bread
Pairing ideas for your freshly baked bread
Now that you’ve mastered the dutch oven bread recipe, it’s time to enjoy the fruits of your labor! Freshly baked bread is incredibly versatile and pairs delightfully with various accompaniments. Here are some suggestions:
- Spreadable flavors: Consider serving your bread with artisanal butters or flavored oils. A nice garlic herb butter or a drizzle of balsamic reduction can elevate your dining experience.
- Cheesy goodness: Cheese platters are a classic! Think creamy brie, sharp cheddar, or tangy goat cheese accompanied by seasonal fruit and nuts for a well-rounded appetizer.
- Soups and Stews: This bread is perfect for mopping up the last spoonfuls of hearty soups or stews—try it with a warm tomato basil soup or savory beef stew!
Creative uses for leftover bread
But what happens if there are leftovers? Fear not! Here are some delightful ways to repurpose your dutch oven bread:
- Croutons: Cube your leftover bread, toss with olive oil and spices, and bake until crispy. Perfect for salads or soups!
- Bread Pudding: Transform your stale bread into a comforting dessert. Mix with custard, sweeten with sugar, and bake for a deliciously nostalgic treat.
- French Toast: Slice and soak in a mix of eggs, milk, and vanilla for an indulgent breakfast that feels like a treat.
By exploring these serving suggestions, you’ll be able to enjoy your dutch oven bread well beyond the first warm slice. For more tips on using bread efficiently, check out resources like King Arthur Baking or Food Network for inspiration!
Time Breakdown for Dutch Oven Bread
When diving into this Dutch oven bread recipe, understanding the time commitment can help you plan better in the kitchen. Here’s a quick breakdown to guide you.
Preparation time
Getting started is easy! You’ll spend about 15 minutes mixing your ingredients and shaping the dough. Just gather your flour, water, yeast, and salt, and you’re on your way. For tips on ingredient selection, check out King Arthur Baking.
Rising time
Once mixed, let the dough rise for 1 to 2 hours. This is when the magic happens! Keep it in a warm, draft-free spot to encourage that lovely fermentation. You can even let it rise overnight in the refrigerator for a more complex flavor.
Baking time
Now, the best part! Preheat your oven and bake for about 30 to 40 minutes. Your kitchen will fill with the tantalizing aroma of fresh bread, and the crust will crisp beautifully in that Dutch oven.
Total time
In total, you’re looking at approximately 2 to 3 hours from start to finish. This includes both the prep and rising times, making it a perfect weekend project or evening treat. Happy baking!
Nutritional Facts for Dutch Oven Bread
Serving Size and Calories
When you whip up a batch of this delicious Dutch oven bread, it’s essential to know what you’re indulging in. Typically, the serving size is one slice, which contains around 80-100 calories, depending on the specific ingredients and portion sizes used in your bread recipe. If you’re keeping an eye on your dietary intake, that’s a pretty manageable number for a homemade treat!
Nutritional Highlights
This Dutch oven bread recipe offers some surprising benefits:
- Whole Grains: Using whole wheat flour can boost your fiber intake, aiding digestion and keeping you fuller longer.
- Low in Sugar: With minimal added sugar, this bread fits well into a balanced diet.
- Versatile Add-ins: Customize it with seeds or nuts for added nutrition and healthy fats.
For more information on the health benefits of whole grains, check out Whole Grains Council.
So, as you bake up this artisan delight, know that it’s not just satisfying your cravings but also providing your body with wholesome nutrients!
FAQs about Dutch Oven Bread
How do I know when my bread is done?
One of the trickiest parts of baking bread is knowing when it’s just right. For your Dutch oven bread recipe, the best way to check is by tapping the bottom of the loaf. If it sounds hollow, your bread is likely done. You can also use a thermometer; the internal temperature should be around 200°F (93°C). Trust me, the smell wafting through your kitchen will also give you a hint that something delightful is baking!
Can I use instant yeast instead of active dry yeast?
Absolutely! While this Dutch oven bread recipe typically calls for active dry yeast, you can substitute it with instant yeast. Just keep in mind that you won’t need to proof instant yeast first—simply mix it in with your dry ingredients. It’s a real time-saver! If you want more insight, check out this detailed article on yeast types from the experts at King Arthur Flour.
What if I don’t have a Dutch oven?
No Dutch oven? No problem! You can still create that crispy crust with a few alternatives:
- Use a heavy, covered pot with similar dimensions.
- Try a baking stone or a pizza stone and cover the bread with a bowl during the first baking phase.
- If you have a large cast-iron skillet, that works too—just make sure it’s oven-safe!
Remember, the goal is to maintain steam during baking for that perfect crust. Got more questions? Feel free to drop them in the comments!
Conclusion on Dutch Oven Bread Recipe
Recap of the Joy of Homemade Bread
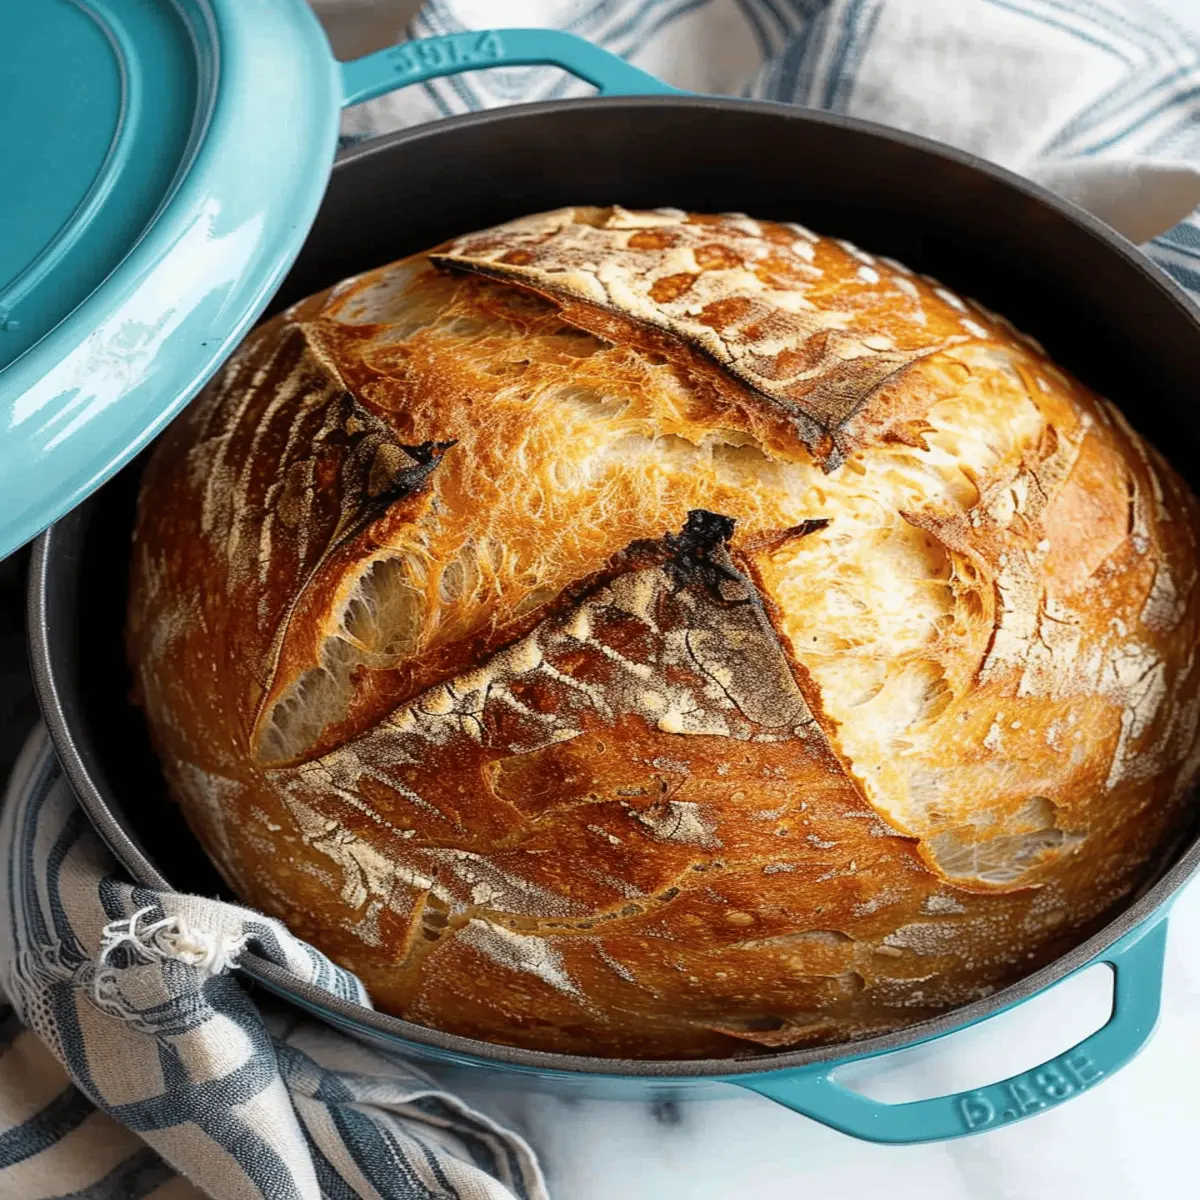
Making bread at home can be a delightful experience that combines art and science. A Dutch oven bread recipe simplifies the process, allowing even novice bakers to create a crusty, artisanal loaf. You can savor the warm aroma filling your kitchen, which is simply unmatched.
Let’s remember the satisfaction of pulling a beautifully browned loaf from your Dutch oven, knowing you crafted it from scratch. It’s not just about the bread itself—it’s about the joy of experimentation and the sense of accomplishment. Dive into this culinary journey, share your creations with loved ones, and embrace the wholesome essence of homemade bread. For more inspiration, check out the variety of bread-making resources available online!
PrintDutch Oven Bread Recipe: The Best Soft & Crusty Loaf Ever
Learn how to make the best soft and crusty Dutch oven bread with this simple recipe.
- Prep Time: 15 minutes
- Cook Time: 45 minutes
- Total Time: 12 hours 45 minutes
- Yield: 1 loaf 1x
- Category: Bread
- Method: Baking
- Cuisine: Dutch
- Diet: Vegetarian
Ingredients
- 3 cups all-purpose flour
- 1.5 teaspoons salt
- 1 teaspoon sugar
- 1.5 teaspoons active dry yeast
- 1.5 cups warm water
Instructions
- In a large bowl, mix the flour, salt, sugar, and yeast together.
- Add warm water and stir until combined.
- Cover the bowl and let it rise for 12-18 hours.
- Preheat the oven and Dutch oven.
- Shape the dough and place it in the heated Dutch oven.
- Bake for 30 minutes, then remove the lid and bake for an additional 15 minutes.
- Let the bread cool before slicing.
Notes
- For a crustier loaf, bake longer.
- Experiment with different flours for unique flavors.
Nutrition
- Serving Size: 1 slice
- Calories: 120
- Sugar: 1g
- Sodium: 200mg
- Fat: 1g
- Saturated Fat: 0g
- Unsaturated Fat: 0g
- Trans Fat: 0g
- Carbohydrates: 24g
- Fiber: 1g
- Protein: 4g
- Cholesterol: 0mg
Keywords: Dutch Oven Bread Recipe