
Introduction to Handmade Sub Rolls
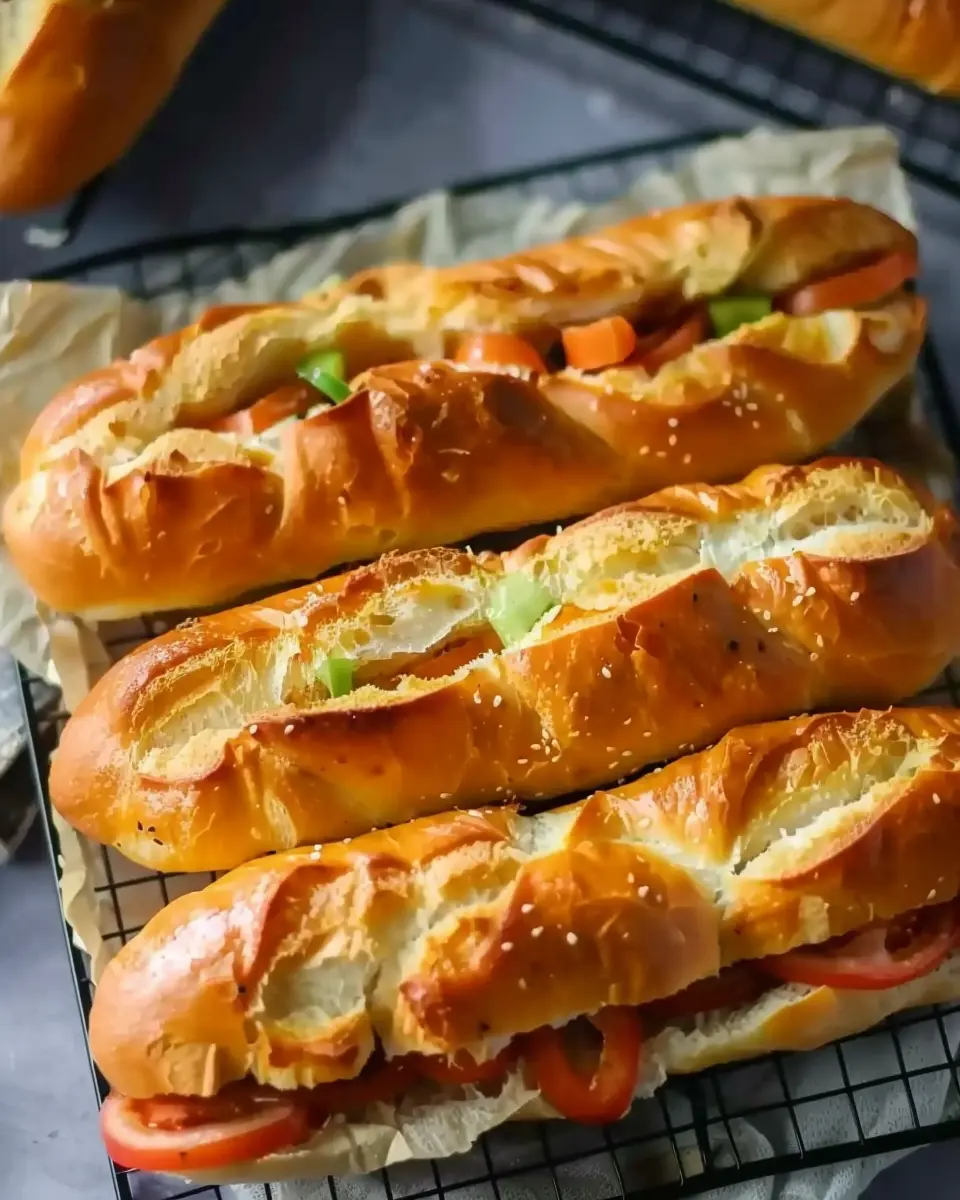
When it comes to sandwiches, nothing beats the experience of biting into a freshly made sub roll. Have you ever wondered why these handmade sub rolls are so special? It’s about more than just taste; it’s an experience you can create in your own kitchen.
Why Handmade Sub Rolls?
Making your own sub rolls can seem daunting, but the rewards are truly worth it. Here are a few reasons to roll up your sleeves and give it a go:
-
Freshness: There’s a distinct difference between store-bought and handmade sub rolls. With just a few simple ingredients — flour, yeast, water, and salt — you can create something that’s fresher than any packaging can guarantee. Plus, the aroma that fills your home while they bake is indescribable.
-
Customization: When you make your sub rolls, you have the freedom to tailor them to your taste. Want to experiment with whole wheat flour or mix in herbs? Go for it! Personalizing your rolls means they’re not only delicious but also perfectly suited to your preferences.
-
Healthier Options: Store-bought rolls often contain preservatives or added sugars. By making your own, you can control what goes in, ensuring a more wholesome choice for your meals. Plus, if you’re looking to have ingredients like Turkey Bacon, Chicken Ham, or even veggies front and center, you can adjust your rolls accordingly.
If you’re curious about the health benefits of homemade bread, check out resources from the Whole Grains Council. They provide great insights about the nutritional value of whole grains, and you might be inspired to incorporate whole grain flour into your sub rolls.
A Personal Touch
I remember the first time I made sub rolls; it was a weekend project that turned into a delightful afternoon. The feeling of pride when my friends took their first bites was incredible. “These are so much better than I expected!” one of them said, and I knew I had hit the mark.
So why not invite your friends over for a sandwich-making party? It’s a great way to bond while enjoying delicious food. After all, what’s better than sharing a meal made with love and care?
So gather your ingredients and get ready to discover the satisfying art of crafting your own handmade sub rolls! You won’t look at sandwiches the same way again.

Ingredients for Handmade Sub Rolls
Creating handmade sub rolls at home can offer a wonderful experience filled with warmth and delicious aromas. The ingredients are simple yet essential for achieving that soft, fluffy texture and rustic flavor. Here’s what you need:
Essential Ingredients
- All-purpose flour: About 4 cups will give your rolls the perfect structure.
- Warm water: 1 ½ cups, around 110°F, helps activate the yeast.
- Active dry yeast: 1 packet (about 2 ¼ teaspoons) ensures your rolls rise beautifully.
- Sugar: Just a tablespoon to nourish the yeast and add a hint of sweetness.
- Salt: 1 ½ teaspoons to enhance flavor.
- Olive oil: 2 tablespoons for moisture and richness.
Optional Ingredients
- Herbs: Consider adding dried oregano or basil for an extra flavor boost.
- Seeds: Sesame or poppy seeds can add a fun crunch when sprinkled on top before baking.
Using quality ingredients is key to making delightful handmade sub rolls. For tips on choosing flour or yeast, you can check out resources like King Arthur Baking.
Experiment with your favorite additional flavors and fillings to take your sub rolls to the next level!
Preparing Handmade Sub Rolls
Creating handmade sub rolls from scratch is an exciting culinary adventure that can elevate your sandwich game to new heights. Whether you’re planning a cozy dinner, weekend gathering, or a simple lunch, these rolls provide the perfect canvas for your favorite fillings. Let’s dive into the step-by-step process to ensure your sub rolls turn out fluffy, flavorful, and absolutely delightful!
Blooming the yeast mixture
To kick off your journey to delectable handmade sub rolls, start by activating the yeast. This is a crucial step, as the yeast is what will give your rolls that delightful rise and airy texture. Here’s how to do it:
- In a small bowl, combine 1 cup of warm water (about 110°F or 43°C) with 2 teaspoons of sugar.
- Sprinkle 2 1/4 teaspoons of active dry yeast over the surface of the water.
- Let it sit for about 5-10 minutes, until it becomes frothy. This bubbling action tells us that the yeast is alive and ready to work its magic!
Mixing the dry ingredients
Next up, we’ll create our dry mixture. This is where the foundation for your handmade sub rolls begins to take shape.
- In a large mixing bowl, combine 3 1/2 cups of all-purpose flour, 1 teaspoon of salt, and 1 tablespoon of bread flour (optional, for extra chewiness).
- Stir these ingredients together until well combined to ensure your rolls have consistent flavor throughout.
Kneading the dough
Now comes the fun part—time to combine the wet and dry ingredients!
- Pour the bloomed yeast mixture into your dry ingredients. Mix until a dough forms.
- Transfer the dough onto a floured surface and knead for about 8-10 minutes. You’ll want to work it until it feels smooth and elastic. This is a great arm workout too! Kneading helps strengthen gluten strands, contributing to that perfect sub roll texture.
For more expert tips on kneading, you might find this resource helpful: King Arthur Baking.
First rise
After kneading, it’s time to let the dough rise.
- Place the dough in a greased bowl, cover it with a clean kitchen towel, and let it rise in a warm environment for about 1 hour or until it doubles in size. This is the magic of baking; maybe use this time to whip up some delicious Turkey Bacon fillings or Chicken Ham if you’re feeling adventurous!
Shaping the sub rolls
Once your dough has risen beautifully, it’s time to shape it into rolls.
- Punch down the dough gently to release excess air.
- Divide it into 6-8 equal pieces, depending on how large you want your sub rolls. Roll each piece into a log shape, tapering the ends slightly.
- Place the shaped rolls on a baking tray lined with parchment paper, leaving some space between each to allow for expanding.
Second rise and egg wash
Before the oven can work its magic, you’ll need to give your rolls another rise.
- Cover the shaped rolls with a towel and allow them to rise again for 30-45 minutes.
- For that golden-brown finish, brush the tops of the rolls with an egg wash made of 1 beaten egg mixed with a little water.
Baking the sub rolls
Finally, it’s time for the moment of truth—baking!
- Preheat your oven to 375°F (190°C).
- Bake the rolls for about 20-25 minutes or until they are golden brown and sound hollow when tapped on the bottom.
- Once baked, let them cool slightly on a wire rack, and your handmade sub rolls are ready to be filled with an array of delicious ingredients.
Now you have not only mastered the art of making handmade sub rolls but also set the stage for countless delicious sandwiches. Enjoy experimenting with your favorite fillings and savor the satisfaction of enjoying fresh bread that you crafted with your own hands. Happy baking!

Variations on Handmade Sub Rolls
When it comes to handmade sub rolls, the possibilities are endless! Let’s explore a couple of delightful variations that can elevate your sandwiches from standard to spectacular.
Garlic and Herb Sub Rolls
Imagine the comforting aroma of freshly baked rolls infused with aromatic garlic and an assortment of herbs. These garlic and herb sub rolls aren’t just for show; they offer an incredible flavor boost to any filling.
- Ingredients: Incorporate minced garlic, dried oregano, and parsley into your dough for a tasty twist.
- Serving Tip: Pair these with roasted vegetables or turkey bacon for a hearty, satisfying meal. The combination of flavors will have your taste buds dancing!
Baking your rolls with herb-infused butter can add an extra layer of richness. Consider garnishing with coarse sea salt for that gourmet touch, transforming your everyday sandwiches into culinary masterpieces.
Whole Wheat Handmade Sub Rolls
For those looking to add a healthful spin, whole wheat handmade sub rolls are perfect. These delicious rolls provide all the benefits of whole grains while maintaining a soft and chewy texture.
- Nutritional Benefits: Whole wheat flour is richer in fiber, aiding digestion and promoting heart health. You can learn more about this from the Whole Grains Council.
- Flavor Profile: Try incorporating sunflower seeds or sesame seeds for added crunch and nutrition!
These versatile rolls can be filled with anything from chicken ham and cheese to a fresh turkey bacon and salad combo. The nutty taste of whole wheat pairs beautifully with savory and fresh ingredients alike!
Incorporating these variations into your sub roll repertoire not only keeps things fresh but also allows room for creativity in your home kitchen. Happy baking!
Cooking Tips and Notes for Handmade Sub Rolls
Making handmade sub rolls can be an enjoyable and rewarding experience in your kitchen. Here are some helpful tips to guide you along the way!
Choosing the Right Flour
Opt for a high-protein bread flour for chewiness and structure. If you’re feeling adventurous, consider blending in whole wheat flour for added flavor and nutrition.
Knead to Succeed
When kneading your dough, aim for about 8-10 minutes of good work. Your dough should become smooth and elastic — if it’s too sticky, don’t hesitate to add a touch more flour.
Proofing Matters
Allow your dough to rise until it doubles in size; this can take about 1-2 hours, depending on room temperature. Warmer environments will speed up the process, so keep an eye on it!
Baking Perfection
For that perfect crust, try placing a pan of water in the oven while your handmade sub rolls bake. This creates steam, resulting in a beautifully crispy exterior.
Personal Touch
Feel free to experiment by incorporating herbs or spices into the dough for a unique flavor twist. What’s your favorite addition?
For further insights on baking techniques, check out resources like King Arthur Baking or Serious Eats. Happy baking!
Serving Suggestions for Handmade Sub Rolls
Creating your own handmade sub rolls is just the beginning! These delightful rolls can serve as a canvas for countless flavor profiles, perfect for any occasion. Here are some serving suggestions to elevate your sandwich game:
Classic Deli Favorites
- Turkey Bacon & Lettuce: Layer crispy turkey bacon with fresh romaine lettuce, tomato, and a smear of mayo for a classic deli-style sandwich.
- Chicken Ham & Cheese: Combine chicken ham with your favorite cheese, like Swiss or provolone, for a satisfying bite.
Hearty Meal Options
- Beef & Veggie Delight: Roast beef piled high with grilled peppers, onions, and a zesty horseradish mayo will leave you wanting more.
- Mediterranean Touch: Stuff your handmade sub rolls with hummus, roasted eggplant, and feta for a fresh, vegetarian option.
Fun and Flavorful Combinations
- BBQ Chicken: Slather shredded chicken with BBQ sauce, add coleslaw, and enjoy a southern classic.
- Breakfast Roll: Fill your roll with scrambled eggs, turkey bacon, and avocado for a morning treat on the go.
Quick Tips for Pairing
- Sides Matter: Consider serving your sandwiches with a side of sweet potato fries or a fresh garden salad.
- Drink Pairings: A refreshing iced tea or a sparkling water with lemon can complement your meal beautifully.
Whether you’re hosting friends or preparing a meal for yourself, these ideas make serving handmade sub rolls a breeze! For more interesting recipes and serving ideas, check out Food Network or Serious Eats.
Time Breakdown for Handmade Sub Rolls
Creating your own handmade sub rolls can feel like a daunting task, but once you break it down, it’s not so bad! Here’s a handy time breakdown to guide you through each step of the process:
Preparation Time
You’ll spend about 15 to 20 minutes mixing and kneading your dough. It’s a fantastic way to unwind after a long day—just you and your ingredients creating something delicious.
Rising Time
Be prepared to let your dough rise for 1 to 1.5 hours. This is the magic moment when your sub rolls become light and fluffy. Perfect time to prep your favorite fillings—try turkey bacon or chicken ham for an unbeatable sandwich combo.
Baking Time
The baking phase takes about 15 minutes. You’ll want to keep an eye on them for that golden-brown finish that we all love!
Total Time
In total, aim for about 2 to 2.5 hours from start to finish, including rising and baking. But don’t worry—much of that time is hands-off, allowing you to enjoy the process and maybe even toss on your favorite series in the background.
For an in-depth look at the science behind bread-making, check out resources from the King Arthur Baking Company. Happy baking!
Nutritional Facts for Handmade Sub Rolls
When you whip up a batch of handmade sub rolls, you’re not just creating a delicious meal but also nourishing your body. Let’s break down some key nutritional facts to keep in mind:
Calories
Each handmade sub roll typically contains around 150 to 200 calories, depending on the size and ingredients. This makes them a great base for various fillings while keeping your meal balanced.
Protein
These rolls can provide approximately 5 grams of protein per serving. Pair them with toppings like turkey bacon or chicken ham, and you’ll bump up that protein intake even more!
Sodium
A standard handmade sub roll contains about 250 milligrams of sodium, but this can vary based on added seasonings and toppings. It’s always good to keep an eye on sodium levels, especially if you’re watching your intake.
For more insights on enjoying your handmade sub rolls healthily, check out Healthline for valuable tips! These rolls can be part of a wholesome diet when made thoughtfully.
FAQs about Handmade Sub Rolls
Can I use instant yeast instead of active dry yeast?
Absolutely! Using instant yeast in your handmade sub rolls is a great option. Instant yeast can be added directly to your dry ingredients without needing to proof it first, which means you can save some time in your baking process. If you do decide to use instant yeast, you can typically use the same amount as active dry yeast, but keep in mind that you may need to reduce your liquid slightly since instant yeast absorbs moisture differently.
How do I store leftover sub rolls?
To keep your leftover handmade sub rolls fresh, follow these simple steps:
- Cool Completely: Make sure your rolls have cooled down completely after baking.
- Wrap or Bag: Store them in an airtight container or wrap them in plastic wrap. If you want extra protection, you can also put them in a resealable plastic bag.
- Room Temperature or Freezer: If you’ll be eating them within a few days, keep them at room temperature. For longer storage, place them in the freezer for up to three months. Just thaw them out when you’re ready to enjoy!
What can I use if I don’t have a stand mixer?
No stand mixer? No problem! You can still make handmade sub rolls without one. Here’s how:
-
Mixing by Hand: Use a large bowl and a sturdy wooden spoon or even your hands. Combine your ingredients and mix until a dough forms.
-
Kneading: Once combined, turn the dough out onto a floured surface and knead it for about 10 minutes. This will develop the gluten and give your rolls that wonderful texture.
Baking can be a therapeutic experience, so don’t stress about the tools you have. Your passion for creating delicious food will shine through no matter what! For more detailed baking tips, you can check out resources on King Arthur Baking.
Your lovely handmade sub rolls are just a few questions away!
Conclusion on Handmade Sub Rolls
Handmade sub rolls are a game-changer for your sandwich-making game. Not only are they fresher than store-bought options, but they also allow you to customize flavors and textures to your liking. Imagine sinking your teeth into a warm roll, perfectly complementing your favorite fillings of chicken ham or turkey bacon.
When you take the plunge to make these rolls from scratch, you’re not just baking bread; you’re crafting an experience. The aroma wafting through your kitchen, the satisfying crunch of the crust—it’s all worth it. So why not roll up your sleeves and give it a try? Discover the joy of handmade sub rolls that elevate your lunches and dinner parties. For more inspiration, check out King Arthur Baking for tips on perfecting your artisanal bread-making skills.
PrintHandmade Sub Rolls: The Best Turkey Bacon and Chicken Ham Delight

Discover how to make handmade sub rolls filled with delicious turkey bacon and chicken ham, perfect for your next meal.
- Prep Time: 15 minutes
- Cook Time: 15 minutes
- Total Time: 30 minutes
- Yield: 4 servings 1x
- Category: Sandwich
- Method: Baking
- Cuisine: American
- Diet: Non-Vegetarian
Ingredients
- 4 sub rolls
- 6 slices turkey bacon
- 4 ounces chicken ham
- 1 cup lettuce
- 1 medium tomato, sliced
- 1/2 cup mayonnaise
Instructions
- Preheat your oven to 350°F (175°C).
- Arrange the turkey bacon on a baking sheet and cook until crispy, about 15 minutes.
- While the bacon cooks, slice the sub rolls in half.
- Spread mayonnaise on both sides of the rolls.
- Layer lettuce, tomato, turkey bacon, and chicken ham on the rolls.
- Top with extra mayonnaise if desired, close the rolls, and serve.
Notes
- You can substitute turkey bacon with regular bacon for a richer flavor.
- Feel free to add cheese for an extra topping.
Nutrition
- Serving Size: 1 sub roll
- Calories: 350
- Sugar: 2g
- Sodium: 700mg
- Fat: 22g
- Saturated Fat: 5g
- Unsaturated Fat: 15g
- Trans Fat: 0g
- Carbohydrates: 30g
- Fiber: 2g
- Protein: 18g
- Cholesterol: 30mg
Keywords: Handmade Sub Rolls, Turkey Bacon, Chicken Ham, Sandwich Recipe