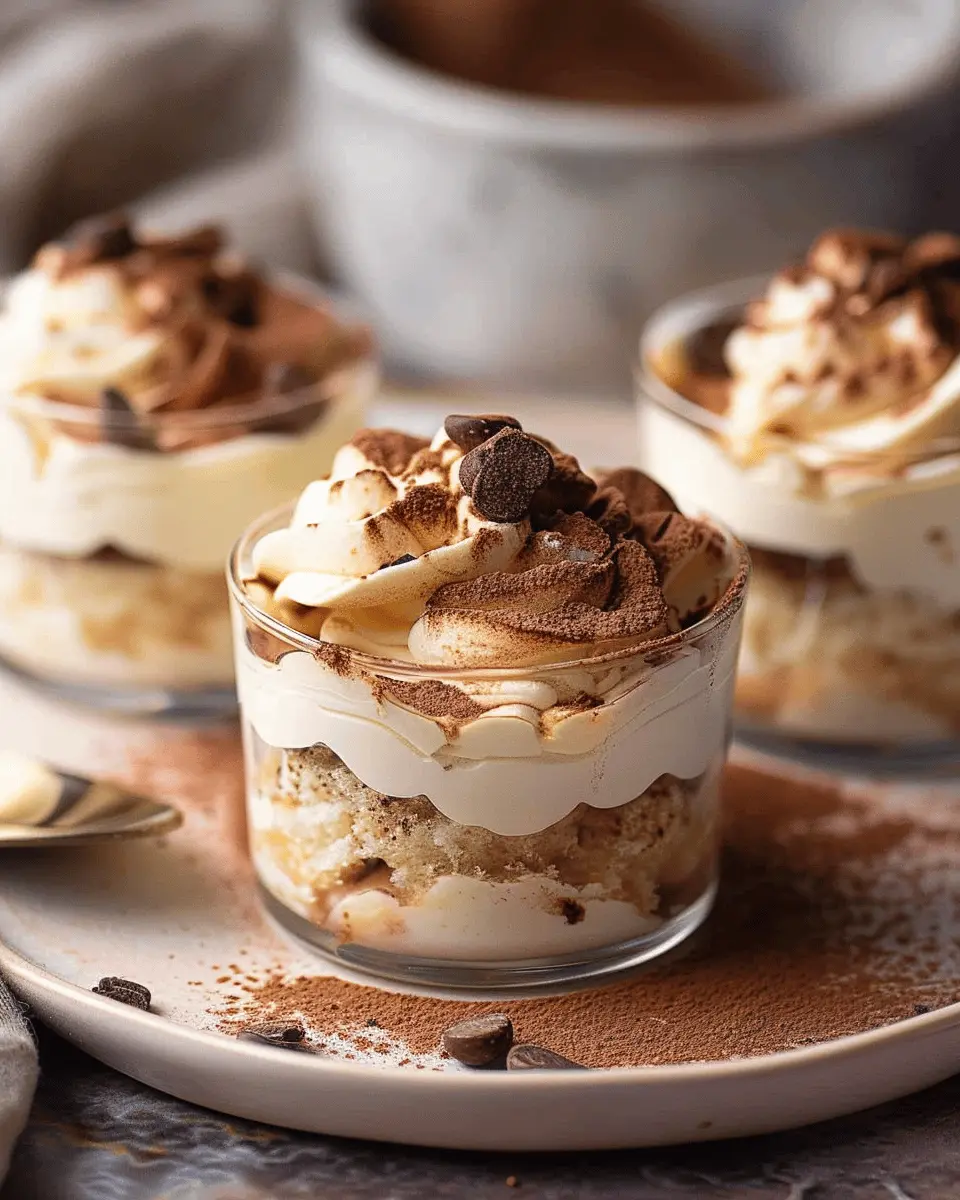
Introduction to Mini Tiramisu Cups
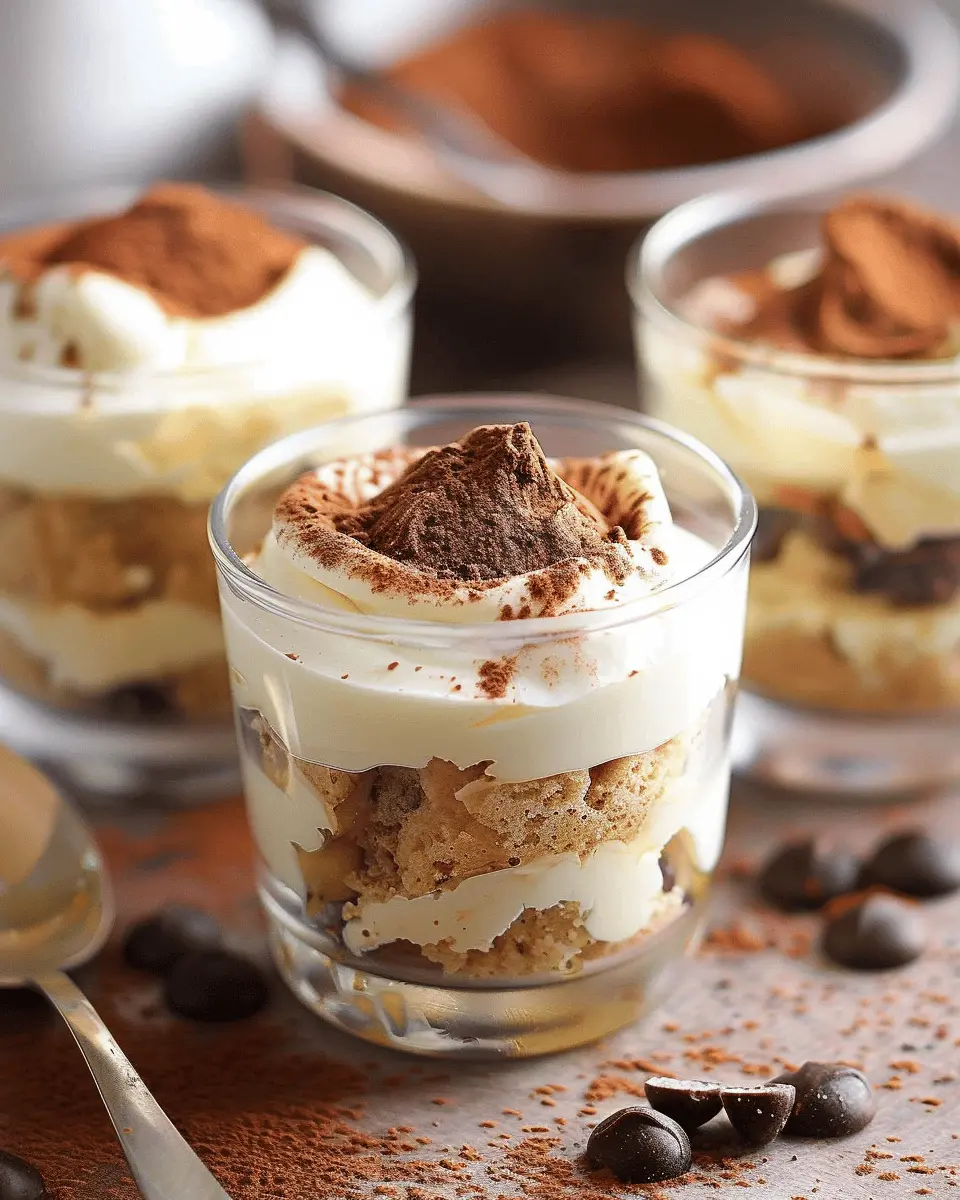
When you think of desserts that elevate the mood after a long workday, mini tiramisu cups should be at the top of your list. These delightful little treats are not just visually appealing; they’re also easy to make and perfect for the busy lifestyle of young professionals. With layers of espresso-soaked ladyfingers and a luscious mascarpone cream, each bite offers an indulgent taste that makes unwinding after a hectic day a delightful experience.
Why Mini Tiramisu Cups Are the Perfect Treat for Young Professionals
Navigating the fast-paced world of work can often leave little room for relaxation, let alone time to whip up elaborate desserts. Enter the mini tiramisu cups, which manage to pack all the flavors of traditional tiramisu into a neat, portable package. Here are a few reasons why they stand out:
-
Time-Saving: These cups can be prepared in advance, allowing you to reclaim your evenings for friends, family, or a good book. Simply assemble them a day ahead and let them chill in the fridge. This way, they’re ready to impress whenever you need an easy dessert solution.
-
Portion Control: Perfect for those who are looking to satisfy their sweet tooth without overindulging. Each mini cup is just the right amount to indulge your cravings without feeling guilty. Plus, they make for fantastic portioned desserts at gatherings.
-
Versatility: Whether you’re hosting a casual dinner, a birthday bash, or simply treating yourself, mini tiramisu cups fit the bill. You can even customize them with different flavors like mocha or matcha for an exciting twist on the classic.
-
Presentation: Presenting these delightful cups is a breeze. You can use clear glass jars or elegant dessert dishes to showcase those beautiful layers of coffee and cream. Guests love a dessert that looks as good as it tastes!
Are you ready to indulge in a sweet escape? With a recipe that suits both novices and seasoned bakers alike, making mini tiramisu cups is a delicious way to add a touch of elegance to everyday life. For more dessert ideas and inspiration, check out the latest trends at Bon Appétit and discover how easy dessert can be!
Ingredients for Mini Tiramisu Cups
Creating mini tiramisu cups is all about balancing rich flavors in delightful portions. Let’s dive into the essential ingredients you’ll need to whip up this indulgent dessert.
Essential Ingredients for the Mascarpone Mousse
- Mascarpone Cheese: The star of the show! This creamy Italian cheese gives your mousse that ultra-smooth texture.
- Heavy Cream: Adds richness and helps lightens up the mascarpone for a fluffy mousse.
- Granulated Sugar: Sweetens the mousse perfectly—feel free to adjust according to your taste.
- Vanilla Extract: A unifying flavor that enhances the creaminess.
Other Necessary Ingredients for the Layers
To build those delightful layers in your mini tiramisu cups, you’ll need:
- Ladyfingers: These sponge biscuits are essential for that classic tiramisu texture.
- Brewed Coffee: Make sure it’s strong and aromatic for that unmistakable coffee kick—espresso works great!
- Cocoa Powder: For dusting on top, it adds that final touch of bitterness to balance the sweetness.
By gathering these ingredients, you’re on your way to creating a delicious treat perfect for any occasion. For more tips on tiramisu variations, check out this source. Happy baking!
Preparing Mini Tiramisu Cups
Creating these delightful mini tiramisu cups doesn’t just make for a delicious dessert, it’s also a fun activity that can enhance any gathering or celebration. Whether you’re hosting a dinner party, celebrating a birthday, or just treating yourself, these bite-sized delights are sure to impress. Ready to dive in? Let’s break down the steps!
Gather Your Ingredients
First things first: you need to assemble your arsenal of ingredients. Here’s what you’ll need to whip up your mini tiramisu cups:
-
For the Mascarpone Mousse:
-
1 cup mascarpone cheese
-
1 cup heavy cream
-
1/2 cup powdered sugar
-
1 teaspoon vanilla extract
-
For the Espresso Mixture:
-
1 cup strong brewed espresso (or coffee)
-
2 tablespoons coffee liqueur (optional)
-
1-2 tablespoons sugar (to taste)
-
For Layering:
-
12-15 ladyfinger cookies (savoiardi)
-
Cocoa powder for dusting
-
Dark chocolate shavings for garnish (optional)
Having everything on hand makes the process simpler and more enjoyable. Plus, when you’re set up, you’ll have more time to savor the moment—and the dessert!
Make the Mascarpone Mousse
The star of your mini tiramisu cups is undoubtedly the mascarpone mousse. To start, beat the heavy cream in a mixing bowl until soft peaks form. This usually takes about 3-5 minutes with a hand mixer. In a separate bowl, blend the mascarpone cheese, powdered sugar, and vanilla extract until smooth.
Next, gently fold the whipped cream into the mascarpone mixture. Be careful here! You want to retain the airiness of the whipped cream for a light texture. This mousse is dreamy and will make your tiramisu unforgettable.
Prepare the Espresso Mixture
While your mousse is setting, it’s time to prepare the espresso mixture. Brew a cup of strong espresso or coffee and let it cool. If you’re a coffee lover, you will appreciate the robust flavor that gives this dessert its character.
Once cooled, you can stir in the coffee liqueur and sugar. Adjust the sweetness according to your taste. This mixture will be used to dip the ladyfingers, so take a moment to taste it—this is where the magic begins!
Constructing the Tiramisu Cups
Now for the fun part: assembling your mini tiramisu cups! Start by cutting the ladyfinger cookies in half (or quarters if you’re using smaller cups) to fit them nicely into your serving dishes. Dip each side of the ladyfinger quickly into the espresso mixture. It’s crucial not to soak them too long; they should be moist but not falling apart.
Place a layer of the soaked ladyfingers at the bottom of your cups. Next, spoon a layer of mascarpone mousse on top. Repeat this layering process until you’ve filled the cups, usually about two or three layers, finishing with a generous layer of mousse on top.
Chill and Set
Once your mini tiramisu cups are assembled, it’s time to let them chill in the refrigerator. This is a crucial step, as cooling allows all the flavors to meld together, creating that classic tiramisu taste. Aim for at least 4 hours, but overnight is even better if you can wait!
Before serving, dust the tops with cocoa powder and add dark chocolate shavings, if desired.
Enjoying these delightful bites will likely become a new favorite tradition in your home. Not only are they delicious and easy to share, but they also provide a visually stunning centerpiece to any dessert table. Happy indulging!
For additional tips and variations, check out Serious Eats or Bon Appétit where you can find gourmet takes on classic desserts!
Variations on Mini Tiramisu Cups
Creating mini tiramisu cups opens the door to delightful twists on this classic dessert. Let’s dive into two fabulous variations that are bound to impress your friends and family at your next gathering.
Chocolate Mini Tiramisu Cups
If you’re a chocolate lover, this variation is your dream come true! By incorporating rich cocoa and dark chocolate, you can elevate the traditional tiramisu experience. Here’s how:
- Introduce cocoa powder: Dust a layer of cocoa powder between the coffee-soaked ladyfingers for an extra chocolaty touch.
- Add chocolate chips: Sprinkle mini chocolate chips in the cream layers for delightful bursts of flavor.
- Use chocolate mousse: Substitute traditional mascarpone with chocolate mousse for a luscious texture. This adds a creamy richness that’s hard to resist!
For a fun presentation, consider using chocolate cups instead of traditional ramekins. Check out How to Make Chocolate Cups for a simple guide.
Fruit-Inspired Mini Tiramisu Cups
For a fresher and more vibrant take, why not infuse your mini tiramisu cups with seasonal fruits? This adds a refreshing contrast to the creamy layers.
- Berry infusion: Layer fresh strawberries or raspberries with your mascarpone for a tart punch. Their natural sweetness pairs brilliantly with coffee and cocoa.
- Citrus zest: Incorporate lemon or orange zest into the cream mixture. A sprinkle of zest not only brightens the flavor but also adds a lovely aromatic element.
- Fruit puree layer: Create a fruity layer using pureed mango or passion fruit, offering a tropical twist that will transport your taste buds.
These variations can easily be adapted for personal preferences. Feel free to mix and match flavors! The beauty of mini tiramisu cups is their versatility, making them perfect for any occasion, whether it’s a cozy get-together or a festive celebration. Which variation are you excited to try first?
Cooking Tips and Notes for Mini Tiramisu Cups
Avoiding Common Mistakes
When making mini tiramisu cups, a few common slip-ups can lead to a less-than-perfect dessert. First, be cautious with the coffee soaking. Too much liquid will make your ladyfingers soggy, ruining the texture. To test the consistency, dip them quickly and remove; they should be moist but not drenched. Additionally, using fresh mascarpone is key. If it’s too cold, it won’t incorporate smoothly, so let it soften slightly before mixing.
Recommended Tools and Equipment
Having the right tools can make your mini tiramisu journey much smoother. Consider these essentials:
- Clear Cup or Glasses: Perfect for showcasing those beautiful layers!
- Mixing Bowls: Use a large bowl for whipping cream and a smaller one for the mascarpone.
- Electric Mixer: For easy whipping of the cream to firm peaks.
- Spoon or Offset Spatula: For layering that delightful mix evenly.
These tools not only enhance your baking experience but also ensure every bite of your mini tiramisu cups is a delightful treat. For more tips on baking tools, check out resources from Serious Eats.
Happy baking!

Serving Suggestions for Mini Tiramisu Cups
Perfect Pairings to Enhance the Experience
Enjoying mini tiramisu cups is all about creating the perfect culinary balance. Pair these indulgent treats with a refreshing cup of coffee or a rich espresso to elevate the flavors. Not a coffee lover? Consider serving them with a vibrant berry smoothie for a brilliant contrast. The tartness of berries complements the creamy layers beautifully. If you want a savory touch, a light cheese platter featuring creamy brie or tangy goat cheese will surprise and delight your guests.
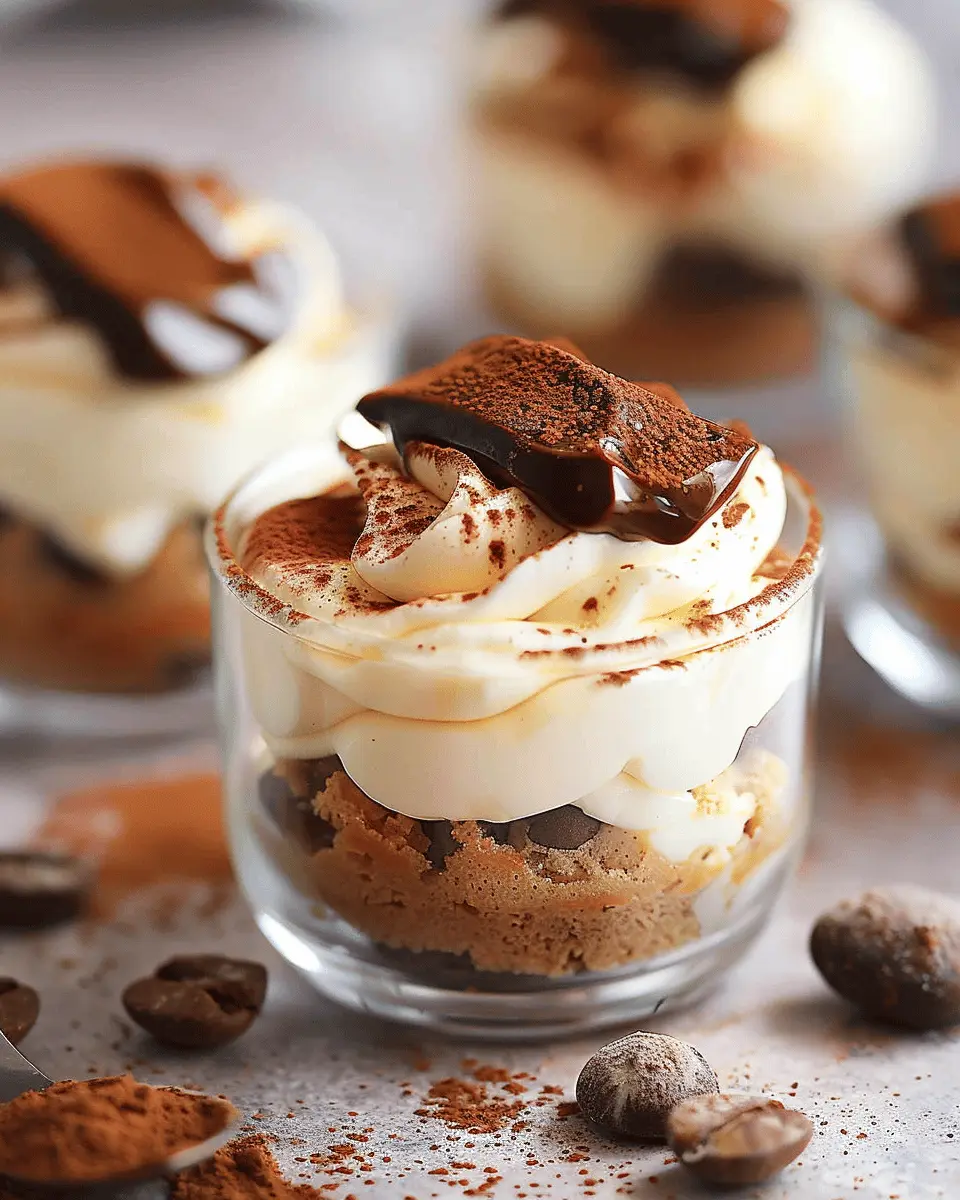
Creative Serving Ideas for Gatherings
When it comes to serving mini tiramisu cups at gatherings, presentation is key! Consider using small mason jars or elegant shot glasses for a chic, rustic feel. Arrange them on a vintage platter, perhaps garnished with cocoa powder or grated chocolate for an extra touch. Alternatively, for a bit of fun, use cookie cups instead of the traditional cups, giving a delightful crunch with each bite. Don’t forget to label each one at larger gatherings—differentiating flavors will keep the excitement alive!
Looking for more tips on entertaining? Check out resources like Epicurious for inspiration on your next gathering.
Time Breakdown for Mini Tiramisu Cups
Preparation Time
Preparing your mini tiramisu cups is a breeze—just set aside about 30 minutes. This is when you’ll whisk together the espresso, mascarpone, and delicious layers of ladyfingers. Gather your favorite ingredients and get ready to indulge!
Chilling Time
After layering, the mini tiramisu cups need some time to chill in the fridge for at least 2 hours. This step allows the flavors to meld beautifully, giving you that creamy, dreamy taste everyone loves. If you can wait longer, it will taste even better—try making them the day before!
Total Time
In total, you’re looking at roughly 2 hours and 30 minutes from start to finish. That means you can whip these up and still have time for a quick catch-up with friends or some relaxing evening unwinding. These mini tiramisu cups are worth every minute!
For more dessert ideas, you can check out this amazing guide on no-bake desserts that will surely impress at your next gathering.
Nutritional Facts for Mini Tiramisu Cups
When indulging in mini tiramisu cups, it’s great to know exactly what you’re treating yourself to! Here’s a quick breakdown of what each serving has to offer:
Calories per Serving
Each delightful cup packs about 150-200 calories, making it a satisfying yet manageable dessert option. Perfect for when you want a sweet pick-me-up without going overboard!
Sugar Content
These mini treats typically contain around 12-15 grams of sugar. If you’re mindful of sugar intake, consider adjusting the sweetness to meet your preferences. Using alternatives like stevia or monk fruit can keep the flavor without the extra sugar.
Dietary Considerations
For those with dietary restrictions, mini tiramisu cups can be made gluten-free by substituting traditional ladyfingers with gluten-free options. Additionally, using dairy-free cream alternatives allows everyone to enjoy a bite. Always check labels for allergens to ensure a safe treat for all guests.
Want more info? Check out Healthline for deeper insights into dessert options and healthier substitutes!
FAQs about Mini Tiramisu Cups
Can I make these ahead of time?
Absolutely! One of the best features of mini tiramisu cups is their flexibility when it comes to preparation. You can make them a day or two in advance, which is a lifesaver for busy hosts. Just assemble the cups, cover them with plastic wrap, and keep them in the refrigerator. Letting the flavors meld overnight can even enhance the taste!
How do I store the mini tiramisu cups?
For optimal freshness, store your mini tiramisu cups in the refrigerator. Use an airtight container or simply cover them with plastic wrap. They’re best enjoyed within 3-4 days, as the textures are at their peak. If you’re wary of soggy ladyfingers or want to make them last longer, you can keep the components separate and assemble just before serving—this will ensure that each layer retains its delightful consistency.
What can I substitute for ladyfingers?
If you’re not a fan of ladyfingers or simply want a variation, there are several delicious alternatives. Consider using:
- Graham crackers: Crush them and layer them just like ladyfingers for a sweet crunch.
- Pound cake: This gives a rich, moist base that complements the luxurious mascarpone.
- Mini sponge cakes: If you can find or bake these, they’re a great substitute that keeps the lightness of the dessert.
Feeling adventurous? You can check out a guide on substituting ingredients for more ideas!
Whether you’re impressing guests or indulging solo, you’ll love how easy and approachable mini tiramisu cups are. Happy baking!
Conclusion on Mini Tiramisu Cups
Recap on Why You Should Try Making Mini Tiramisu Cups
Mini tiramisu cups are a delightful way to elevate any gathering without a huge time investment. They are the perfect balance of creamy mascarpone and rich coffee flavors, all conveniently portioned into adorable servings. Whether you’re hosting a dinner party or just looking to treat yourself, these cups are sure to impress.
Not only are they easy to make, but they also allow for creative customization—add fruit, switch up the coffee for a decaf alternative, or incorporate a hint of chocolate. So why not take a break from your usual desserts and give these mini tiramisu cups a try? Your taste buds will thank you! For more dessert inspiration, you might want to explore Serious Eats.
PrintMini Tiramisu Cups: Indulgent Dessert Perfect for Any Occasion

Mini Tiramisu Cups are the perfect indulgent dessert for any celebration, providing a delightful twist on the classic Italian dessert.
- Prep Time: 20 minutes
- Cook Time: 0 minutes
- Total Time: 20 minutes
- Yield: 4 servings 1x
- Category: Dessert
- Method: No-Bake
- Cuisine: Italian
- Diet: Vegetarian
Ingredients
- 1 cup strong brewed coffee
- 2 tablespoons coffee liqueur
- 2 cups mascarpone cheese
- 1 cup heavy cream
- 1/2 cup granulated sugar
- 1 teaspoon vanilla extract
- 12 ladyfinger cookies
- 2 tablespoons unsweetened cocoa powder for dusting
Instructions
- In a shallow dish, combine the brewed coffee and coffee liqueur.
- In a mixing bowl, whip the heavy cream until soft peaks form, then add the sugar and vanilla extract and continue to whip until stiff peaks form.
- In another bowl, whisk the mascarpone cheese until smooth.
- Gently fold the whipped cream into the mascarpone cheese until well combined.
- Dip each ladyfinger into the coffee mixture briefly, then layer them in the bottom of serving cups.
- Spread a layer of the mascarpone mixture over the soaked ladyfingers.
- Repeat the layers until all ingredients are used, finishing with the mascarpone mixture on top.
- Dust the top with cocoa powder before serving.
Notes
- For a richer flavor, use espresso instead of regular coffee.
- Feel free to add a sprinkle of chocolate shavings on top for an extra touch.
Nutrition
- Serving Size: 1 cup
- Calories: 350
- Sugar: 25g
- Sodium: 70mg
- Fat: 25g
- Saturated Fat: 15g
- Unsaturated Fat: 8g
- Trans Fat: 0g
- Carbohydrates: 30g
- Fiber: 1g
- Protein: 5g
- Cholesterol: 80mg
Keywords: Mini Tiramisu Cups, dessert, indulgent dessert, Tiramisu, Italian dessert