Introduction to Salted Caramel Tart
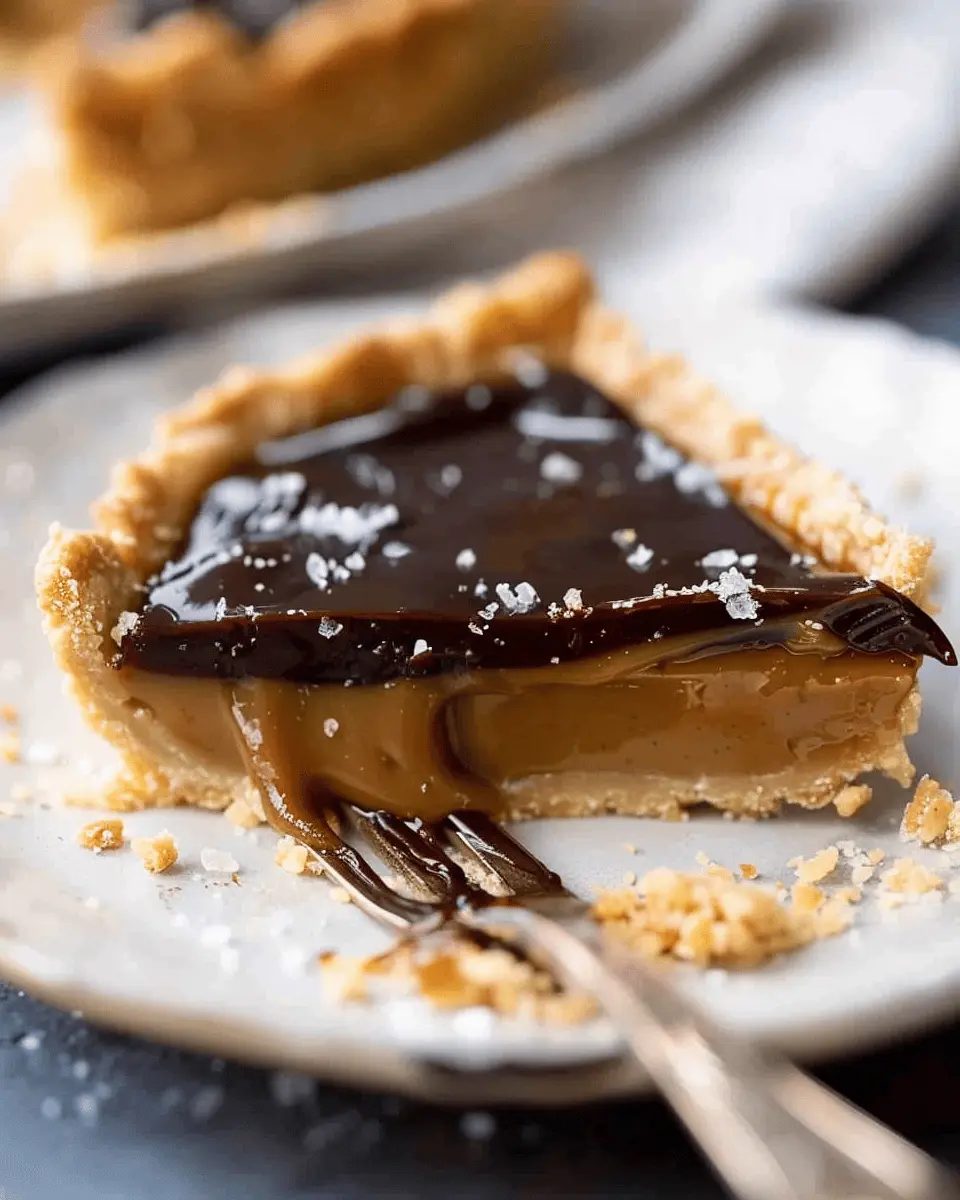
When it comes to choosing the perfect homemade dessert, few things can match the allure of a salted caramel tart. It’s not just any dessert; it’s a melt-in-your-mouth experience that combines the rich flavors of buttery caramel and a hint of sea salt, all nestled in a crisp tart shell. This delightful treat strikes that elusive balance between sweet and savory, making it an ideal closing note for any gathering, whether it be a casual dinner with friends or a festive celebration.
Why salted caramel tart is the perfect homemade dessert
So, what makes a salted caramel tart so special? For starters, it’s surprisingly versatile! You can customize it with your favorite toppings, such as fresh fruits, whipped cream, or even a drizzle of chocolate ganache. This flexibility means it can cater to a variety of tastes and occasions, making it a go-to option in your dessert repertoire.
From merging sweet and salty flavors to the satisfying crunch of the tart crust, this dessert has something for everyone. Imagine serving a slice to your friends and watching their expressions light up with delight. According to a study published by the National Association for Catering and Events, dessert can elevate a meal, making it memorable and something guests look forward to!
Let’s not forget the joy of creating it yourself. The process of making a salted caramel tart can be incredibly rewarding. You get to witness the transformation of simple ingredients like sugar, butter, and cream into the luscious caramel that fills your tart. Plus, whipping it up in your kitchen provides a wonderful opportunity to bond with friends or family. Picture this: laughter, conversation, and sweet aromas wafting through the house—it’s more than just a dessert; it’s an experience.
If you’d like to dive deeper into the art of making caramel, you can check out organizations like the American Confectioners Association for expert insights and tips. So, are you ready to embark on this delicious journey? Your homemade salted caramel tart is just a recipe away!
Ingredients for Salted Caramel Tart
Creating a delectable salted caramel tart is a delightful venture. Let’s break down the essential components to make this dessert a real showstopper.
Essential ingredients for the crust
The crust is the foundation of your tart, and you’ll want it to be both buttery and crumbly. For a perfect balance, gather these key ingredients:
- All-purpose flour: 1 ½ cups
- Unsalted butter: ½ cup (cold and cubed)
- Granulated sugar: ¼ cup
- Salt: A pinch
- Egg yolk: 1 large (for richness)
For a deeper flavor, consider using brown sugar instead of granulated sugar for extra warmth.
Key components for the caramel filling
Now for the star of the show—your luscious caramel filling! This is what elevates your salted caramel tart to heavenly status. Here’s what you need:
- Granulated sugar: 1 cup
- Heavy cream: ½ cup (warm, helps prevent crystallization)
- Unsalted butter: 6 tablespoons
- Sea salt: 1 teaspoon (or to taste)
- Corn syrup: 2 tablespoons (prevents crystallization)
If you’re curious about making caramel from scratch and want to dive deeper, check out resources like Serious Eats.
Toppings to elevate your tart
To take your salted caramel tart over the top, consider these delicious toppings:
- Flaky sea salt: A sprinkle on top enhances flavor.
- Whipped cream: For a light, airy touch.
- Chopped nuts: Pecans or walnuts add a delightful crunch.
- Chocolate shavings: Drizzling dark chocolate can bring in a rich contrast.
Incorporating these elements will ensure your tart isn’t just good, but unforgettable. What toppings are you excited to try? The possibilities are endless!
Step-by-step Preparation of Salted Caramel Tart
Creating a luscious salted caramel tart is a delightful adventure in your kitchen that’s as rewarding as it is delicious. Let me guide you through this step-by-step process so you can impress your friends and family with your culinary skills!
Prepare the tart crust
The foundation of your salted caramel tart starts with a flaky and buttery crust. Here’s how to make it:
-
Ingredients:
-
1 1/2 cups all-purpose flour
-
1/2 cup powdered sugar
-
1/2 cup unsalted butter, cold and cubed
-
1 egg yolk
-
A pinch of salt
-
Directions:
- In a food processor, combine the flour, powdered sugar, and salt.
- Add the cold cubed butter and pulse until the mixture resembles coarse crumbs.
- Add the egg yolk and pulse until it forms a dough. If it’s too crumbly, add a teaspoon of cold water.
- Press the dough into a tart pan, making sure to cover the bottom and sides evenly. Prick the base with a fork to prevent bubbling.
- Chill for at least 30 minutes while you prepare the filling.
Chilling your crust is a critical step! It helps maintain the structure during baking, resulting in a perfectly crispy texture.
Making the salted caramel
Now comes the star of the show: the salted caramel! This wonderfully sweet and savory mixture is what sets this tart apart.
-
Ingredients:
-
1 cup granulated sugar
-
6 tablespoons unsalted butter, cut into pieces
-
1/2 cup heavy cream
-
1 teaspoon sea salt (or more to taste)
-
Directions:
- In a saucepan over medium heat, melt the sugar, stirring continuously until it turns a rich amber color. Don’t walk away—it can go from perfect to burnt in seconds!
- Once melted, carefully add the butter (it will bubble vigorously). Stir until melted and well combined.
- Slowly pour in the heavy cream (it will bubble again) and stir until smooth. Remove from heat and add sea salt.
- Let cool slightly before pouring it into your chilled tart crust.
Salted caramel can seem intimidating, but with a bit of attention and patience, you can master it. For expert insights, check out resources like Serious Eats for more on caramel techniques.
Assemble the tart
The assembly is straightforward and a crucial phase. Once your caramel has cooled:
- Pour the caramel mixture into your pre-baked tart crust, spreading it evenly.
- Tap the tart gently on the counter to remove any air bubbles.
Now, the tart is almost complete! But we’re not done yet; it’s time to let it set.
Chill and set
After assembling, you’ll want to let your salted caramel tart chill.
- Put the tart in the refrigerator and let it set for at least 2 hours (or overnight, if you can wait!).
- This step is crucial for a clean slice and ensures all those delicious flavors meld together beautifully.
There’s something so satisfying about patiently waiting while a delicious dessert transforms into its final form.
Decorate with toppings
Finally, it’s time for the fun part—decorating your tart!
- Suggested toppings:
- Whipped cream
- Flaked sea salt
- Crushed nuts (like pecans or almonds)
- Shaved chocolate
Simply drizzle or sprinkle your chosen toppings over the tart once it’s fully set, enhancing both its appearance and flavor.
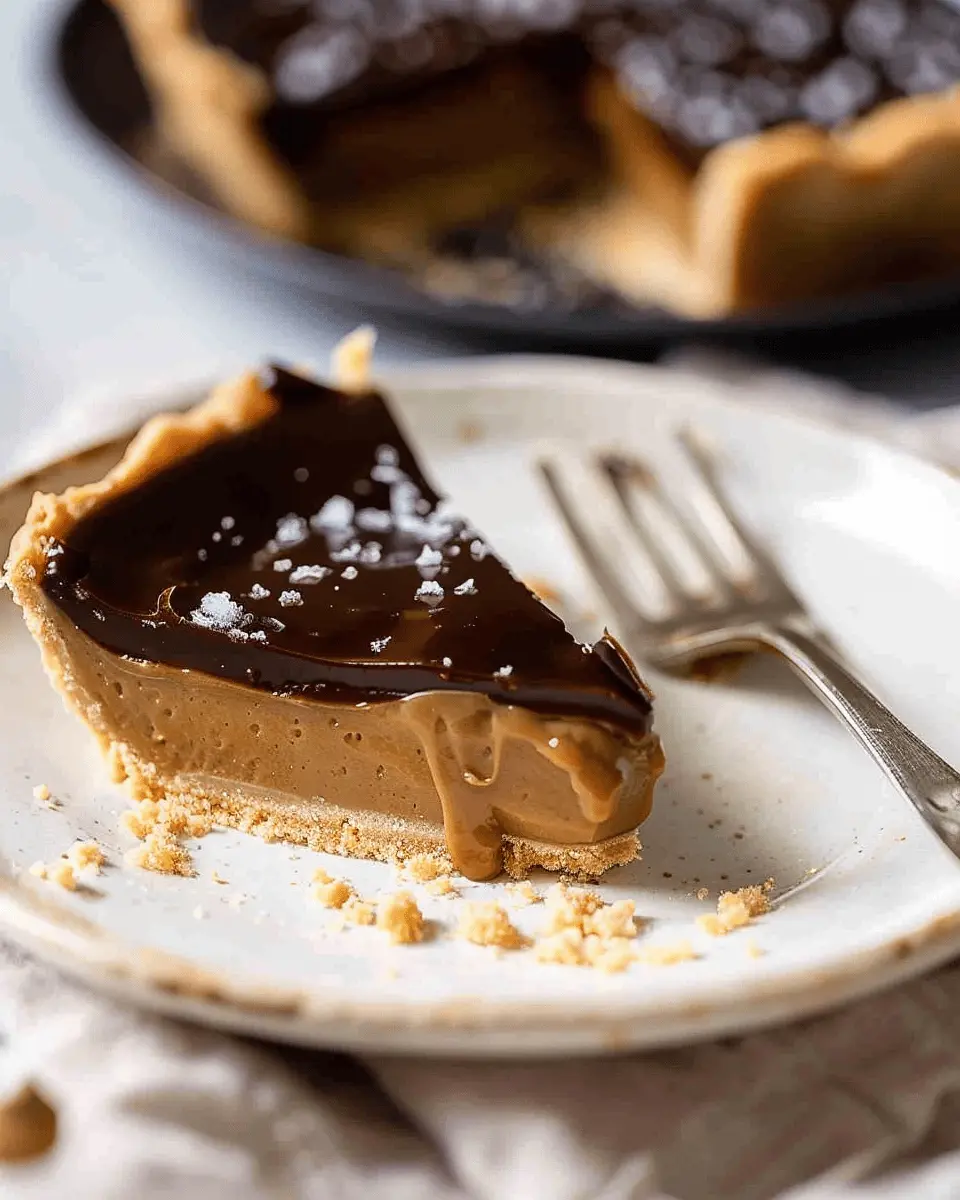
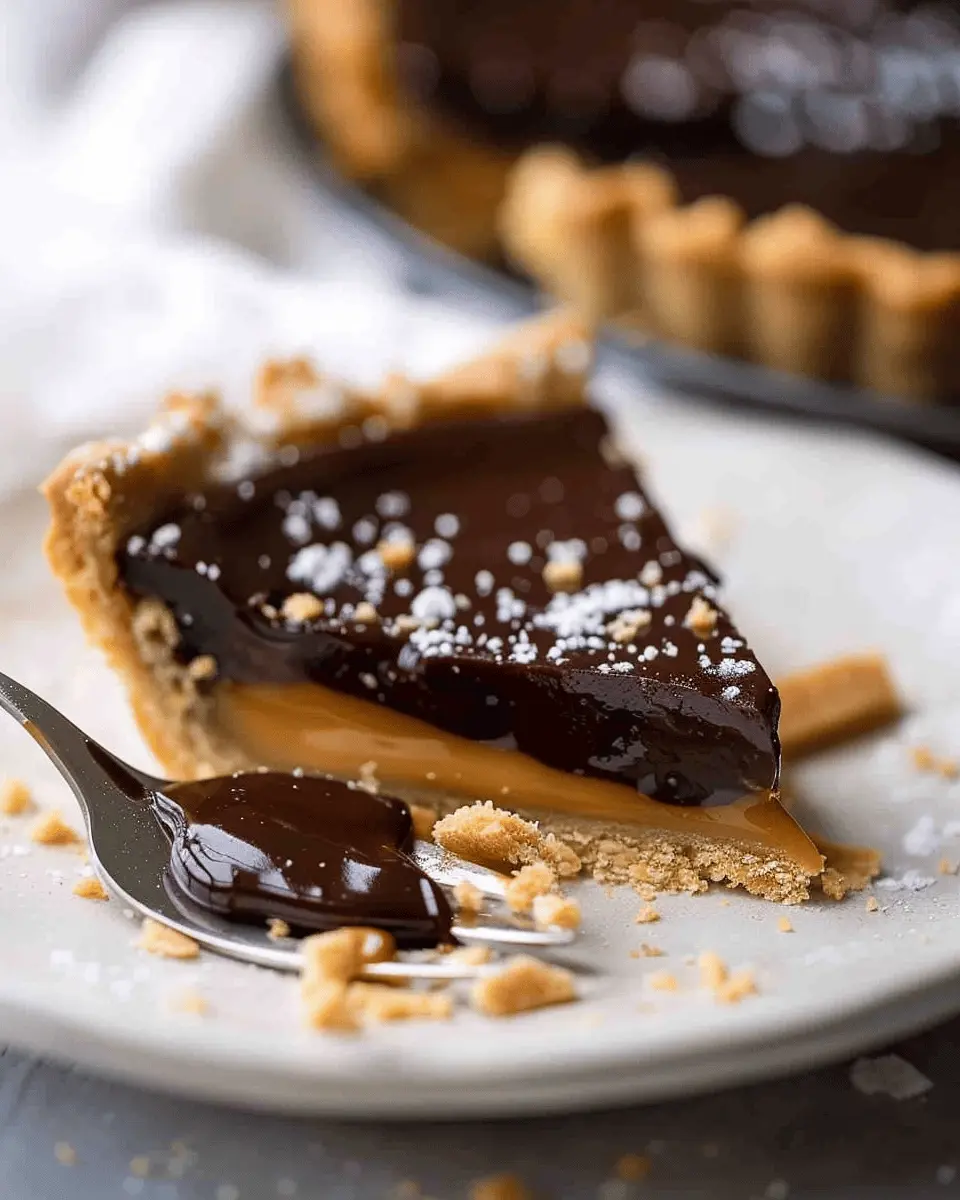
Imagine slicing into that rich, creamy tart, with the crunchy crust playing off the gooey salted caramel and the touch of whipped cream. Doesn’t that sound heavenly?
Creating a salted caramel tart at home is not just a dessert; it’s a beautiful culinary experience that you can share. So, gather your ingredients, put on your favorite cooking playlist, and enjoy the process!
Variations on Salted Caramel Tart
There’s just something about salted caramel tart that makes it a crowd-pleaser. But why stop at just one version? Let’s explore some delightful variations that add a twist to this classic dessert.
Salted Caramel Chocolate Tart
Craving something richer? A salted caramel chocolate tart is your answer. By combining the lovely notes of dark chocolate with the sweet-salty flavor of caramel, you create a luxurious experience.
- Ingredients: For the crust, use crushed chocolate cookies mixed with butter. The filling can remain similar, but adding melted dark chocolate to the caramel mixture elevates the dish to new heights.
- Serving Suggestion: Top it with a sprinkle of sea salt and a dollop of whipped cream for an elegant touch.
This version not just satisfies your sweet tooth but also captivates chocolate lovers. You can find some great inspiration from chocolate experts like Serious Eats.
Nutty Salted Caramel Tart
For those with a penchant for crunch, the nutty salted caramel tart is a fabulous alternative. By incorporating nuts, you not only add texture but also an extra layer of flavor.
- Base: Consider using a pecan or almond crust for a unique twist.
- Filling: Blend in some crushed nuts with the salted caramel. You can choose walnuts, almonds, or even hazelnuts to boost the flavor profile.
Give it a shot, and you’ll likely discover that the nuttiness complements the caramel beautifully. Nut fans extol the health benefits of nuts, which you can explore further at Healthline.
No matter which variation you choose, each tart is sure to impress and satisfy. So, go ahead and unleash your creativity in the kitchen—your friends and family will thank you!
Cooking Tips and Notes for Salted Caramel Tart
Common pitfalls and how to avoid them
Creating the perfect salted caramel tart can be a rewarding experience, but it does come with a few challenges. One common pitfall is burning the sugar while making the caramel. To avoid this, use a heavy-bottomed saucepan and keep the heat on medium. Stir gently until the sugar melts, monitoring it closely to ensure it reaches a deep amber color without burning.
Another issue is a soggy tart crust, which happens when the filling seeps through. To prevent this, consider blind baking your crust for a few minutes. You can find excellent guidance on this in this detailed article on baking techniques.
Storage tips for your tart
Once your salted caramel tart is ready, you might wonder how to store it. Ideally, keep it in the fridge, covered with plastic wrap, for up to a week. This helps maintain its freshness while allowing the flavors to meld beautifully. If you have leftovers (though that’s unlikely!), slice the tart first, so it’s easier to grab a piece when the craving hits!
For more tips on food storage and flavor enhancement, check out resources from the USDA. Happy baking!

Serving Suggestions for Salted Caramel Tart
Pairing with Ice Cream
A salted caramel tart is simply divine on its own, but when paired with the right ice cream, it transcends into dessert bliss. Opt for creamy flavors like vanilla bean or a rich chocolate—these are fantastic counterpoints to the caramel’s richness. If you’re feeling adventurous, a scoop of sea salt or coffee ice cream can add an exciting twist. Did you know that the creaminess of ice cream enhances the tart’s texture, creating a lovely contrast? It’s a duo that’s bound to impress at any gathering!
Looking for a brand to try? Häagen-Dazs and Ben & Jerry’s offer some delightful flavors that you can easily find at your local grocery store.
Garnishes That Complement the Tart
When serving your salted caramel tart, a thoughtful garnish can elevate the presentation and the tasting experience. Here are some ideas:
- Chopped Nuts: Crushed pecans or walnuts add a lovely crunch.
- Whipped Cream: A dollop of lightly sweetened whipped cream softens the tartness.
- Chocolate Drizzle: A drizzle of melted dark chocolate adds a luxurious touch.
- Fruits: Fresh berries or slices of pear provide a refreshing contrast.
These garnishes not only enhance the flavor but also add visual appeal. With these suggestions, your salted caramel tart will be a true showstopper at any dessert table! For some more ideas on dessert pairings and tips, check out the Food Network’s dessert section.
Time Breakdown for Salted Caramel Tart
Preparation Time
To create the perfect salted caramel tart, you’ll want to set aside about 30 minutes for preparation. This includes gathering your ingredients, mixing your tart crust, and chilling it before baking. As a tip, making sure your butter is at room temperature can speed things up!
Cooking Time
The baking process will take approximately 25 minutes, giving your tart a golden, perfectly baked crust. Meanwhile, you’ll need an additional 10 minutes to cook your salted caramel sauce to ultimate deliciousness.
Total Time
In total, you’re looking at around 1 hour and 5 minutes from start to finish. Trust me, every moment spent is worth it once you take that first delightful bite. If you’re in the mood for even more delightful dessert ideas, check out resources like Serious Eats for inspiration!
Nutritional Facts for Salted Caramel Tart
When it comes to enjoying a delicious salted caramel tart, it’s essential to be mindful of its nutritional profile. Indulging every now and then is part of living well, but here’s what to expect.
Calories
A typical slice of salted caramel tart contains about 250-300 calories. This varies based on portion size and specific ingredients used, so it’s a good idea to keep track if you’re counting calories.
Sugar Content
With the rich caramel and buttery crust, expect around 20-25 grams of sugar per slice. While this might seem high, it’s best to remember that desserts like this are meant to be enjoyed in moderation. If you’re concerned, consider using a natural sweetener for a lighter option.
Fats
The tart is rich in fats, largely due to the butter and cream used in the filling. You can anticipate about 15-20 grams of fat per slice, including both saturated and unsaturated fats. Balancing your meal with fruits or a light salad can make for a happier, lighter dessert experience!
For more details on dessert nutrition, check out the USDA’s Food Data Central for comprehensive data. Enjoy your baking!
FAQs about Salted Caramel Tart
How do I know when the caramel is ready?
Determining the perfect consistency of your caramel for a salted caramel tart can be tricky, but trust your senses! The caramel is ready when it achieves a deep amber color and exudes a rich, inviting aroma. You can also use a candy thermometer; aim for around 350°F (175°C). If you don’t have one, simply drop a small amount into cold water. If it forms a soft ball, you’re good to go! For a more detailed guide on caramel techniques, check out this expert resource for invaluable tips.
Can I use store-bought crust?
Absolutely! If time is of the essence or if you want to simplify the process, a store-bought crust can be a lifesaver. Just make sure to choose a high-quality one; there are many options available, including graham cracker and shortbread varieties. If you’re feeling adventurous, you can elevate the flavor by adding a pinch of sea salt to the crust before baking. This little touch will enhance the overall flavor experience of your salted caramel tart!
How can I make this tart gluten-free?
Making a gluten-free salted caramel tart is easier than you might think! Opt for a gluten-free cookie crust, using alternatives like almond flour or gluten-free graham crackers. You can usually find these options at your local grocery store. Additionally, ensure that any caramel ingredients (like butter and cream) are certified gluten-free. For more ideas on gluten-free baking options, consider checking out this informative article from Gluten-Free Living.
Whether you’re a seasoned baker or a novice, these tips will help you create a salted caramel tart that’s sure to impress!
Conclusion on Salted Caramel Tart
The Delight of Making and Enjoying Your Own Tart
Creating your own salted caramel tart is not just about following a recipe; it’s an experience that cultivates joy and satisfaction. Picture the moment you pull your beautifully golden tart from the oven; that rich aroma fills your kitchen, enticing you and anyone nearby.
Enjoying your masterpiece is that rewarding second act. As you slice into the smooth, luscious layers and revel in the perfect balance of sweet and salty, you’ll understand why this dessert is a favorite. Share it with friends or indulge alone—either way, you’re in for a treat!
For inspiration on dessert pairings, check out this guide. As you become more confident with your baking, consider exploring variations of your salted caramel tart, which you can find on baking blogs. Happy baking!
PrintSalted Caramel Tart: The Best Delicate Indulgence for Home Chefs

A rich and delicious salted caramel tart that every home chef can master.
- Prep Time: 30 minutes
- Cook Time: 20 minutes
- Total Time: 2 hours 50 minutes
- Yield: 8 servings 1x
- Category: Dessert
- Method: Baking
- Cuisine: American
- Diet: Vegetarian
Ingredients
- 1 cup all-purpose flour
- 1/2 cup unsalted butter
- 1/4 cup powdered sugar
- 1 large egg yolk
- 1 cup granulated sugar
- 6 tablespoons unsalted butter
- 1/2 cup heavy cream
- 1 teaspoon sea salt
Instructions
- Preheat the oven to 350°F (175°C).
- In a mixing bowl, combine flour, butter, and powdered sugar to form the tart crust.
- Press the mixture into a tart pan and chill for 30 minutes.
- Bake the crust for 20 minutes until golden.
- In a saucepan, melt granulated sugar over medium heat until it caramelizes.
- Add the butter and stir until melted, then mix in the cream and salt.
- Pour the caramel into the baked crust and let it cool completely.
- Chill in the refrigerator for at least 2 hours before serving.
Notes
- Use high-quality chocolate for the best flavor.
- Allow the tart to sit at room temperature for 10 minutes before serving.
Nutrition
- Serving Size: 1 slice
- Calories: 320
- Sugar: 25g
- Sodium: 150mg
- Fat: 18g
- Saturated Fat: 11g
- Unsaturated Fat: 5g
- Trans Fat: 0g
- Carbohydrates: 36g
- Fiber: 1g
- Protein: 3g
- Cholesterol: 80mg
Keywords: Salted Caramel Tart, Tart, Dessert, Indulgence